
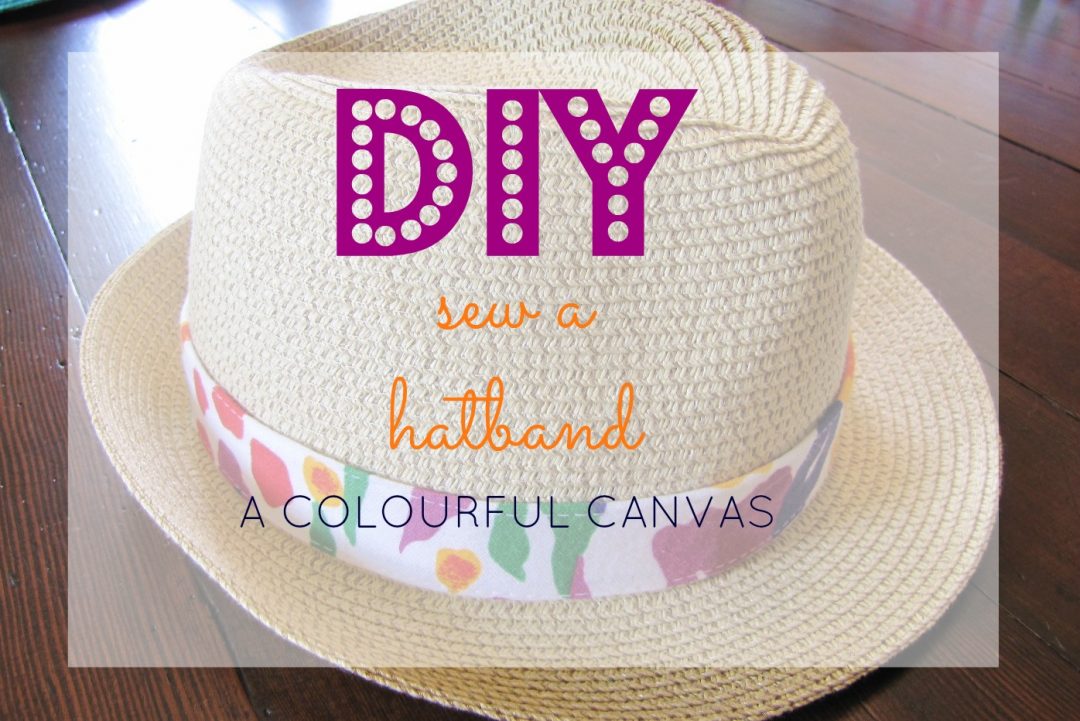
DIY: Sew A Hatband…

It’s time to a take a simple straw hat from drab to fab. Today’s little tutorial is easy to do, but it does require the use of a sewing machine. I’ve had this Trilby style straw hat for a few years, and have seldom worn it. On the plus side, it’s lightweight and comfortable, but it’s also, well…yawn, a bit boring. I had some fabric scraps left over from my sundress project and decided now was the perfect time to create a versatile hatband.

1. The first step is to wrap a piece of elastic around the hat. I used 1″ wide pyjama elastic. It’s soft, and has the amount of stretch I’m looking for in this project. I fit the elastic snugly around the hat, stretching the elastic slightly. Overlap ends by 1″. Cut elastic.
2. Cut a piece of fabric the length of your elastic plus 1″ x double the width of the elastic. Note: I am using a cotton jersey which does not unravel. If you are using a woven fabric, you will need to consider finishing your edges with either a zig-zag stitch, your serger, or by folding under the raw edge. Also, if you are using a woven fabric, I suggest that you cut your fabric strip on the bias. They will give you that little bit of stretch helpful for fitting the band on the hat.
3. Fold fabric around elastic along each long edge and pin. Okay, time to head over to the sewing machine. Sew the length of your fabric covered elastic with a long stitch. I used the longest stitch on my machine, stitch length 4. Sew close to the outside edge, stretching elastic lightly as you sew. Sew both long edges.
4. Overlap ends by 1″, folding in any raw edges. Stitch the two layers of fabric together. I wasn’t as tidy with this step as I’d like to be, but I’m not expecting people to be looking all that closely at my hatband. I stitched around each edge in a box shape, and diagonally across once.

The hatband looks great as is, or you can add a bow or other decorative element. I had 10″ of elastic left over, knew I would never use it for anything else…my waist ain’t never gonna be 12″ is it now?…and so I simply covered my elastic scrap with a piece of fabric using the same technique described above, and folded it into a double bow. Cute, huh? You could also add a pretty flower, or a brooch, and you can use your hatband on any of your hats. The photo on the left is of a favourite hat of mine. You’ve seen it here. I’ve just slipped my new hatband over top of the hat’s original black band. Ta Da! Now, that I’ve got this easy technique under my hat, you can expect to see more hats on my head. And you? Are you inspired to wear a hat this summer?


24 Comments
Very cute DIY.
Wow, cute idea!!! Too bad you missed your Sale. Dang. I hate when that happens. But happy July 1st to you. Hope your day will be fun.
You are so darn crafty! These ordinary hats were transformed into something really special. LOVE this.
Hello Sue,
Of course I will wear a hat that summer. Mine is red and has a black band. Now I saw your cute colorful one, I think black is too boring. Thank you for sharing your idea with us. I will try pimp up my hat as well.
Sabine xxx
Great tutorial! Now I will have to buy a hat 😉
I am so going to try this : )
bisous
Suzanne
This is a fantastic idea. I love how much it adds to a look, it makes a huge difference. This has made me think of so many different details I could potentially add to hats.
What a good idea. I have been looking for a floppy summer hat (all mine are winter hats…) but maybe I will also keep an eye out for a neat little straw trilby! xxx
What a cute idea! It makes such a difference!
Hapoy day to you!
karianne
What a great idea and so nice of you to take the time to do this tutorial.
I used to make headbands for each one of my daughters dresses when I did their Sunday School dresses.
That's so clever dear Sue, nicely done!
A wonderful, colorful DIY!!! You are spreading joy everywhere!! Can I say your energy is infectious? I love seeing what you are doing, my fellow Type 1. 🙂 !!!
Brilliant idea, I will certainly take inspiration from your post.
Nice blog dear!
Thanks so much for dropping by and commenting on my blog!
FF
I am not very good at sewing so I have appreciated your tutorial. And . . . I didn 't think it had been so complicate to do!! You are a real expert in sewing!!
Oh, yay, this is the perfect summer DIY project and I think I can even handle it. You are such a sweet heart to share these with us. Thank you, thank you, thank you!
And, yes, I am greatly inspired to wear hats this summer. I think its a fun way to keep the sun off my face, and it adds character to an outfit.
Hi Sue! Great DIY! Thanks for stopping by my blog and saying hello. Your comment was so sweet. Totally made my day! Nice to “meet” you.
Tracy
Very clever and creative Sue. Nothing like making a hat more interesting, and you certainly did do that! Great colors.
Clever addition – I love this style hat! Thank you for the birthday wishes! X
What a fun, marvelous way to jazz up a classic straw topper. I haven't made a hat band since the braided ones we created back in Girl Guides. I do occasionally adorn some of my vintage hats with (removable) ribbons or pin brooches to them though, to further jazz them up in a similar nature.
♥ Jessica
*PS* Thank you very much for your comment and question on my vintage outfit post yesterday. No, my blog doesn't have a search feature, I'm sorry. What kind of garment(s) are you thinking about making? I might know of some vintage images featuring such pieces that I'd be more than happy to share with you, dear Sue.
This is such a cute DIY! Thank you for sharing.
xo, Meera | http://www.momentswithmeera.com
Sue, I love the result!! I will have to try this out. I love to sew, but I am not sure I would have thought of the elastic part!
xoxo
Lynn
Sooooooooooooooooo lovely.
XXXXXXXXXXXXXXXXXXXXXXX
Great tutorial!
[…] source […]