
SOPHIE SWIMSUIT MASHUP
Well hiya! As promised, I’m back with Part I of my Sophie Swimsuit Mashup Guide. I’ll be showing you how I added the wings from the View B bikini to the View A one piece suit. When I was pattern testing for Closet Case Files Sophie Swimsuit, I discovered I needed more support than the one piece provided and this mashup was my solution. Yes…the back band serves a very practical purpose…but it’s also an attractive design feature. More options for colour blocking, for example….or, as seen in Heather’s Sophie Swimsuit Styling Inspiration post…you can get creative with how large, wide, deep a back opening you want.
All righty…away we go…and please, please keep in mind that I am not a professional pattern drafter…I’m pretty darn sure my methods here can be improved upon. That being said…..this way has been working fine for me…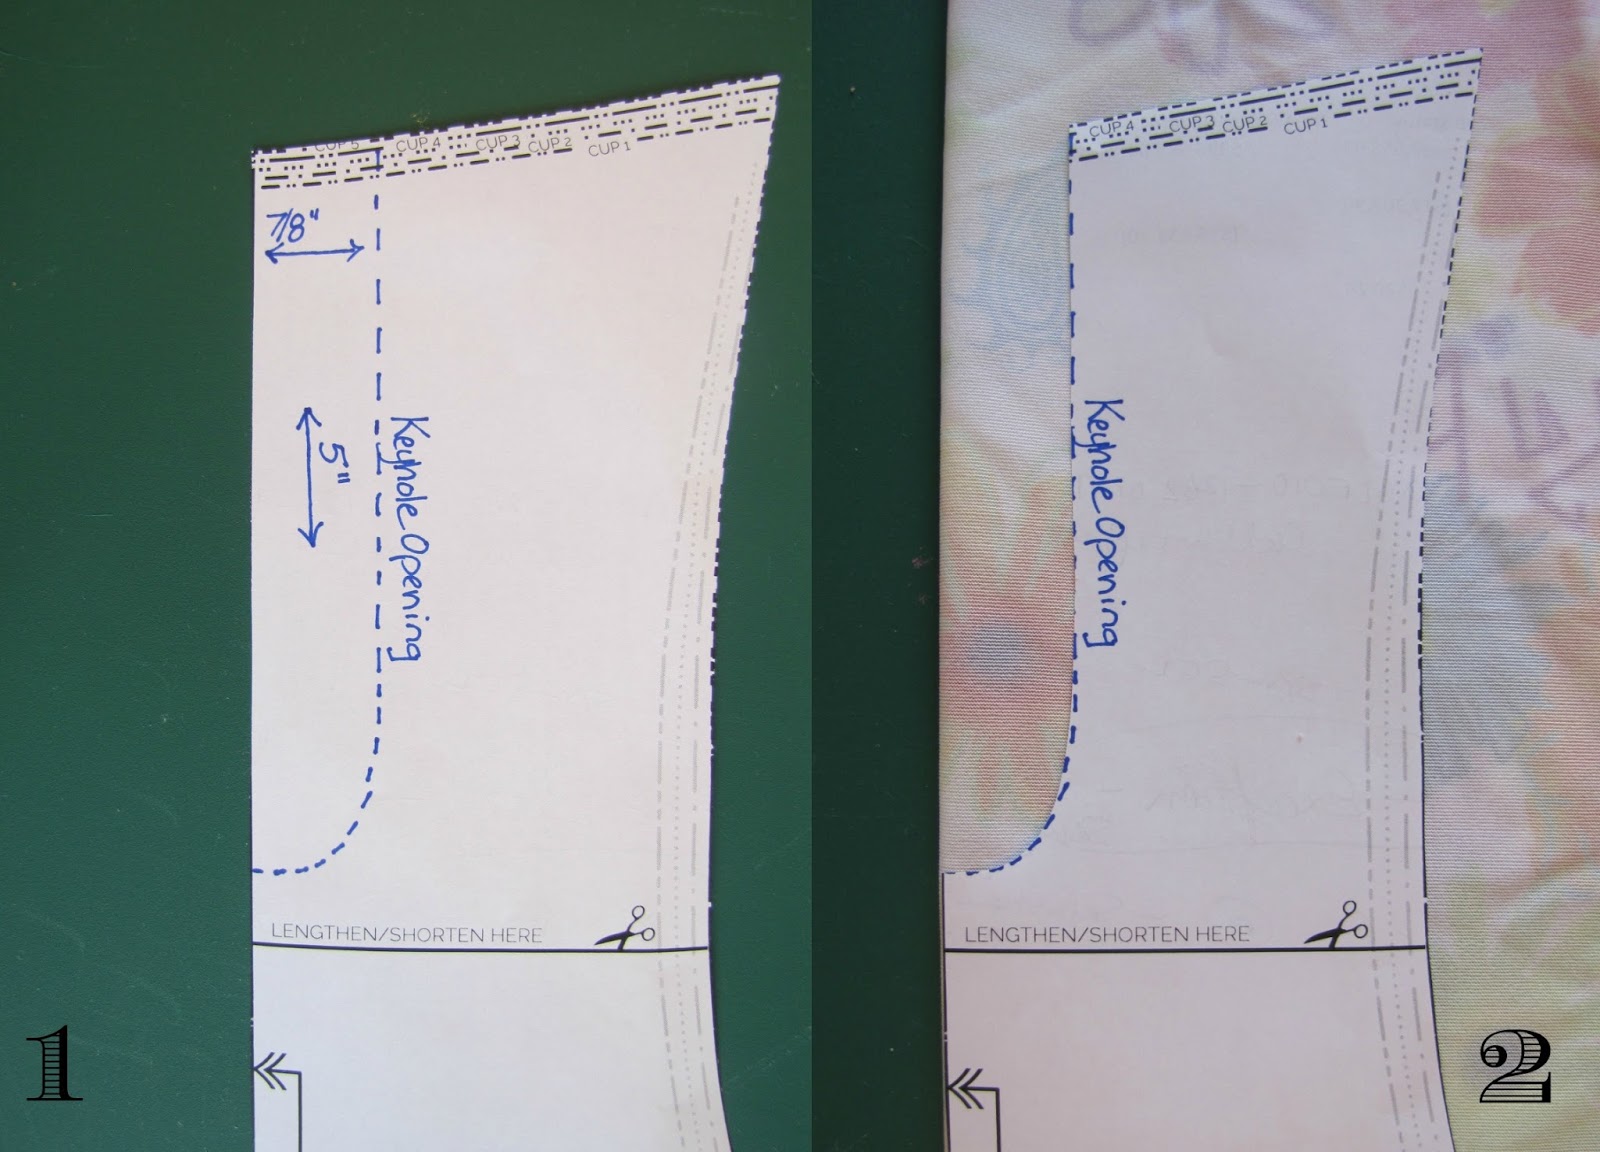
All righty…away we go…and please, please keep in mind that I am not a professional pattern drafter…I’m pretty darn sure my methods here can be improved upon. That being said…..this way has been working fine for me…

1. Step one…grab your center back pattern piece and draw your keyhole opening. For reference, I measured 7/8″ in from the center fold line and 5″ from top to bottom of opening. Depending on the pattern size you are sewing, you may wish to adjust these measures. {I’m 5’2″ and made a size 2/8 suit} If you decide you want a really wide, shallow opening, you will need to alter the side back pattern piece as well.
2. Lay out and cut all your one piece pattern pieces.
3. In addition to your one piece pattern pieces, you will need the wing pattern piece from View B.
4. As you can see in image 3, the wing is lower than the one piece back. No problemo…you can cut out as is, or change the shape of the wing to match the top of the one piece. I used a 3 hook closure on all of my suits so I made the wing bigger {from top to bottom} in order to fit the closure.
5. Cut out your wing pieces in fabric and lining. For reference, I’ve used power mesh lining, but you might be able to get away with regular lining depending on your needs.
Above….here’s a visual of my suits. I used the original wing pattern piece on the suits left and center. On the tankini {right photo} I drafted the wing to sit higher. Looking at this comparison, I like the original best!
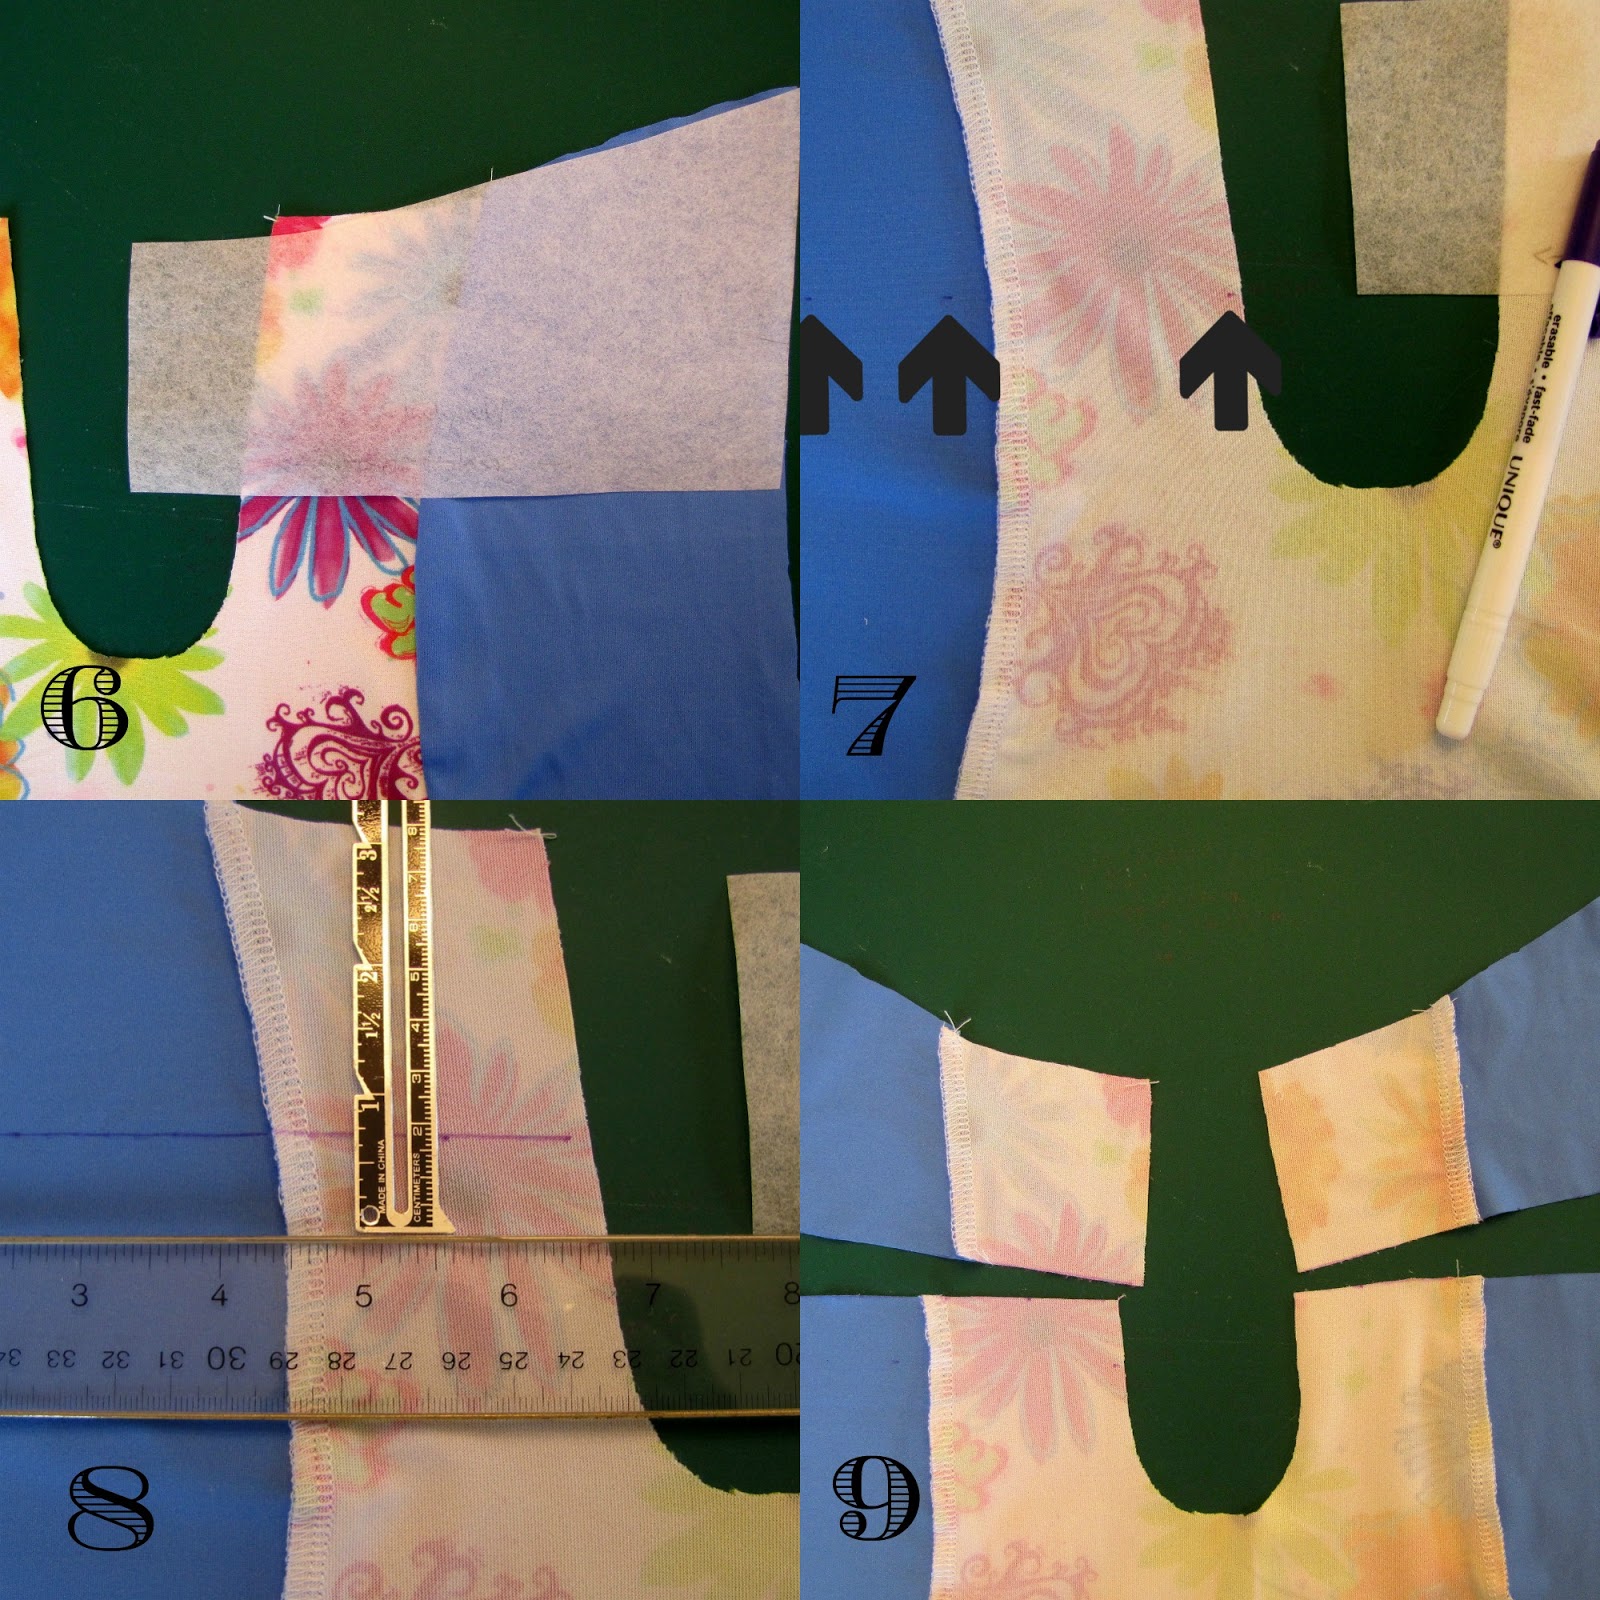
6. After sewing the side back panels to the center back panel, lay your wing pattern piece on top of the wrong side of your swimsuit back. {Yes, that is the right side in my photo…my bad.} The straight edge of the wing will not line up exactly with the outside edge of your swimsuit…don’t worry…it will work out fine.
7. Lightly mark a line, or dots, along the bottom edge of the wing pattern piece. I’ve highlighted my little dots with arrows because they are super faint. Flip the wing to the other side of your back piece and continue marking. This finished line, or row of dashes or dots, should be a straight line across the back of your suit. This line should be parallel to the lengthen/shorten lines on the back pattern pieces. This is not a cutting line!
8. All righty…I’m using my ruler as a straight edge. I’ve got it lined up on top of my row of dots and I am measuring 3/4″ above those dots. I mark this with a solid line!
9. Cut along the solid line. Reminder….this is a full 3/4″ above your dotted line.
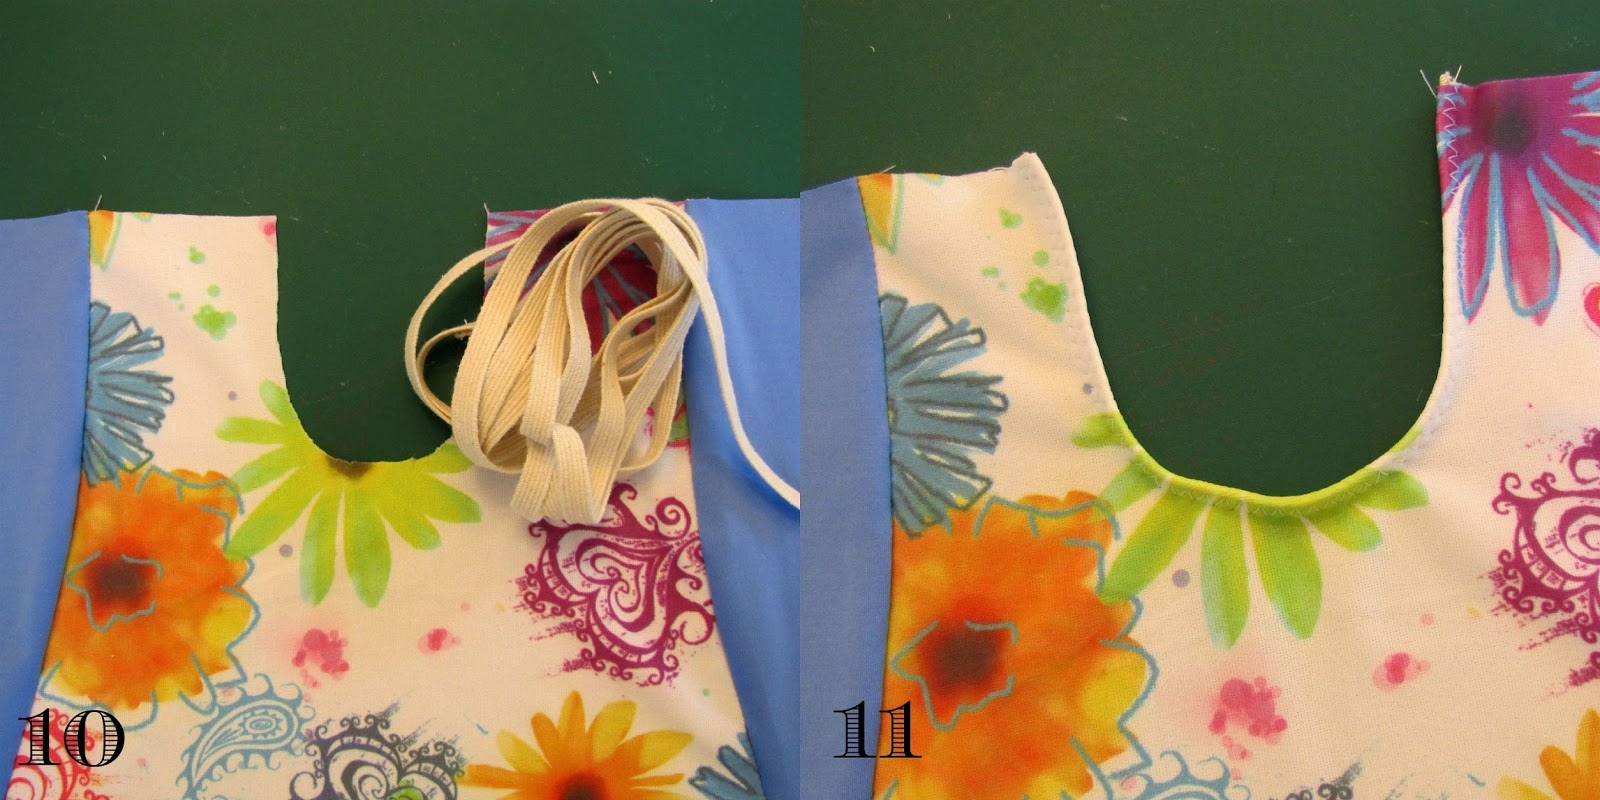
10. Time to finish off the keyhole. I’m using 1/4″ swimsuit elastic, following the general elastic application instructions for the Sophie Swimsuit.
11. The finished opening!
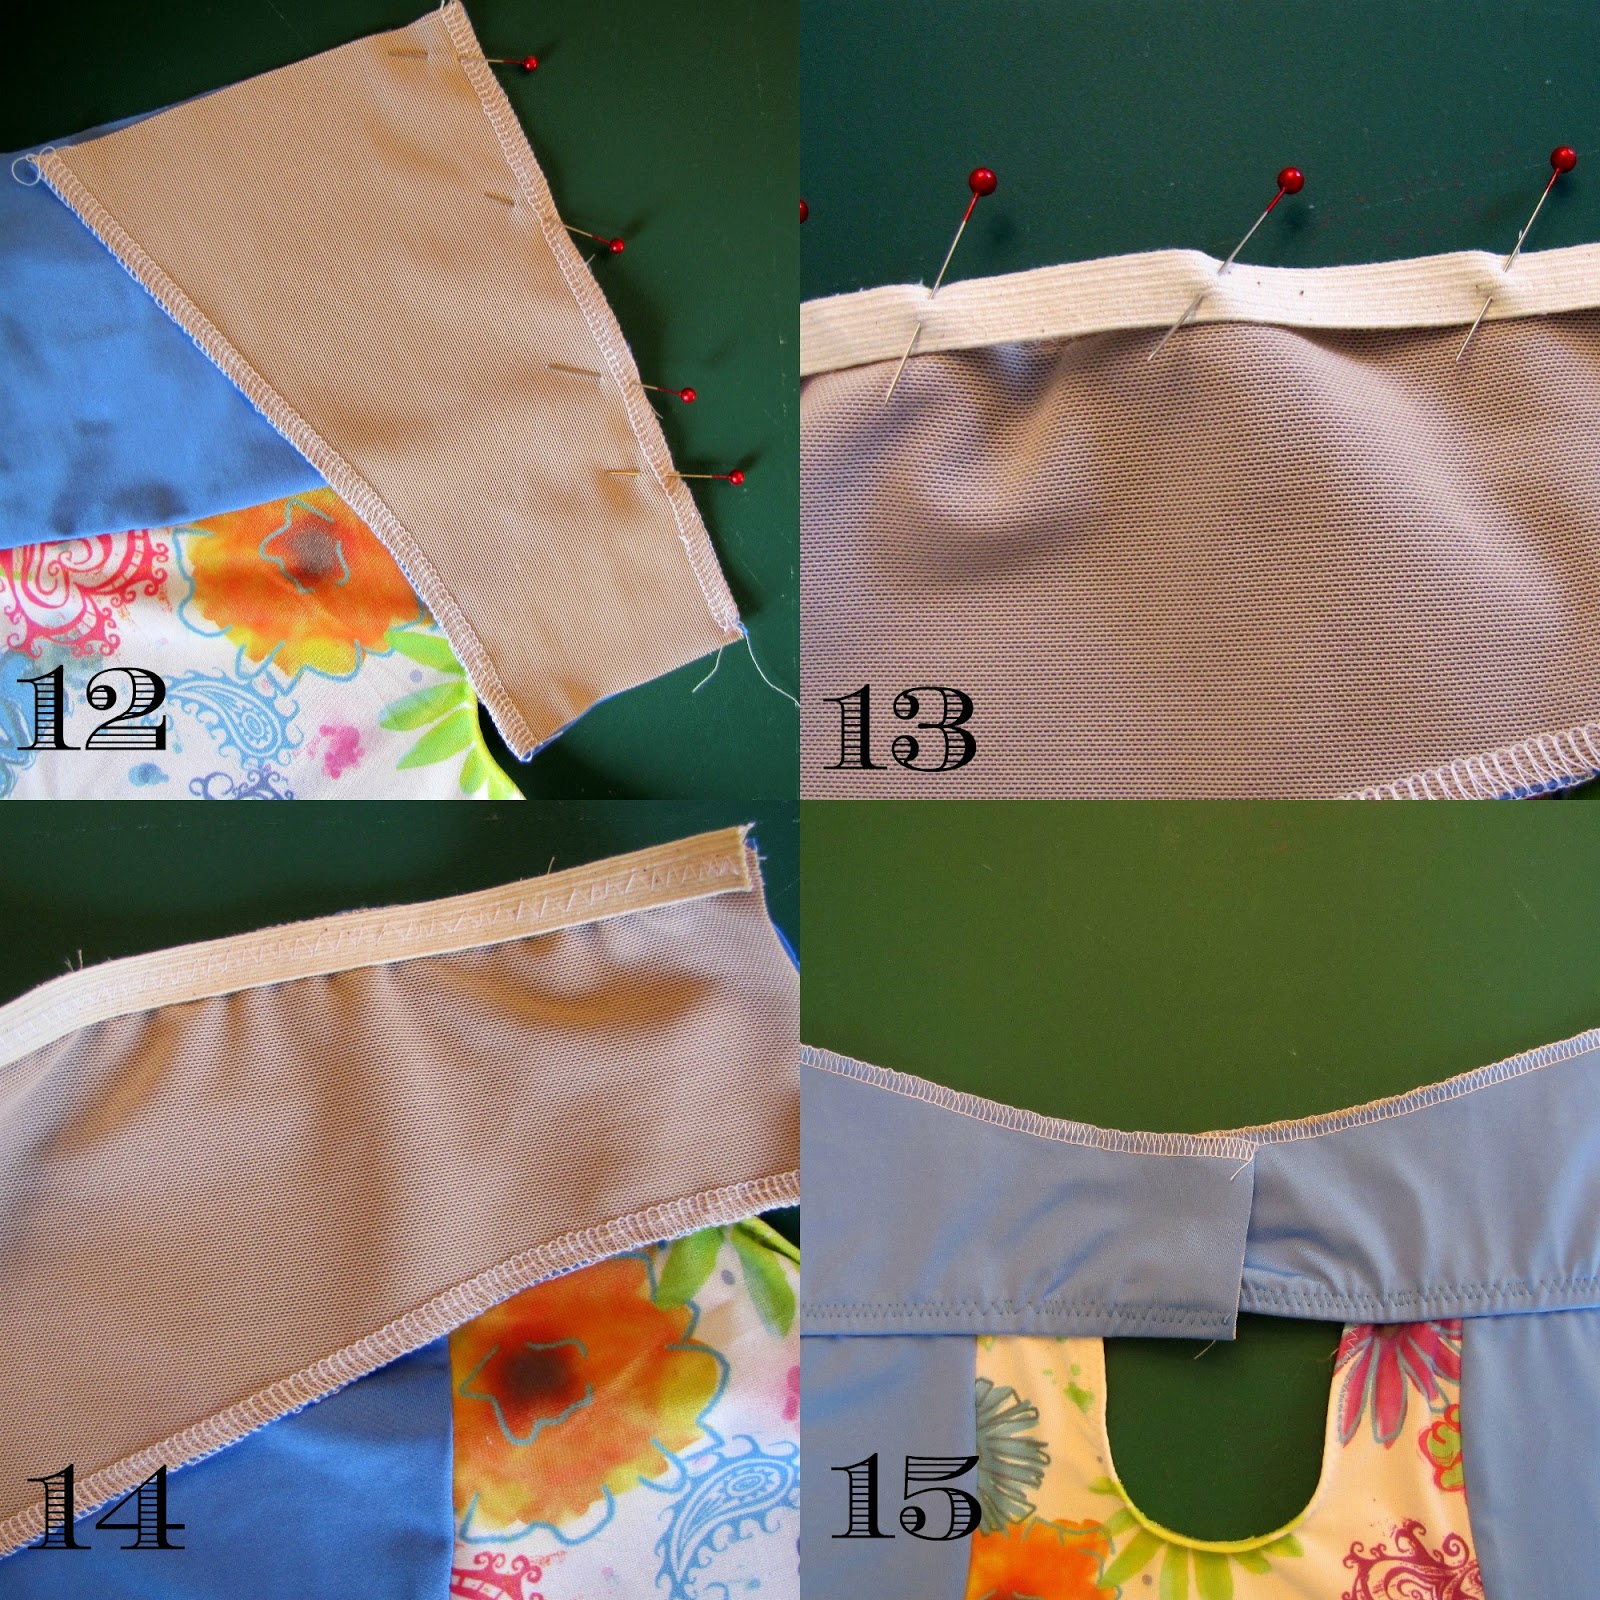
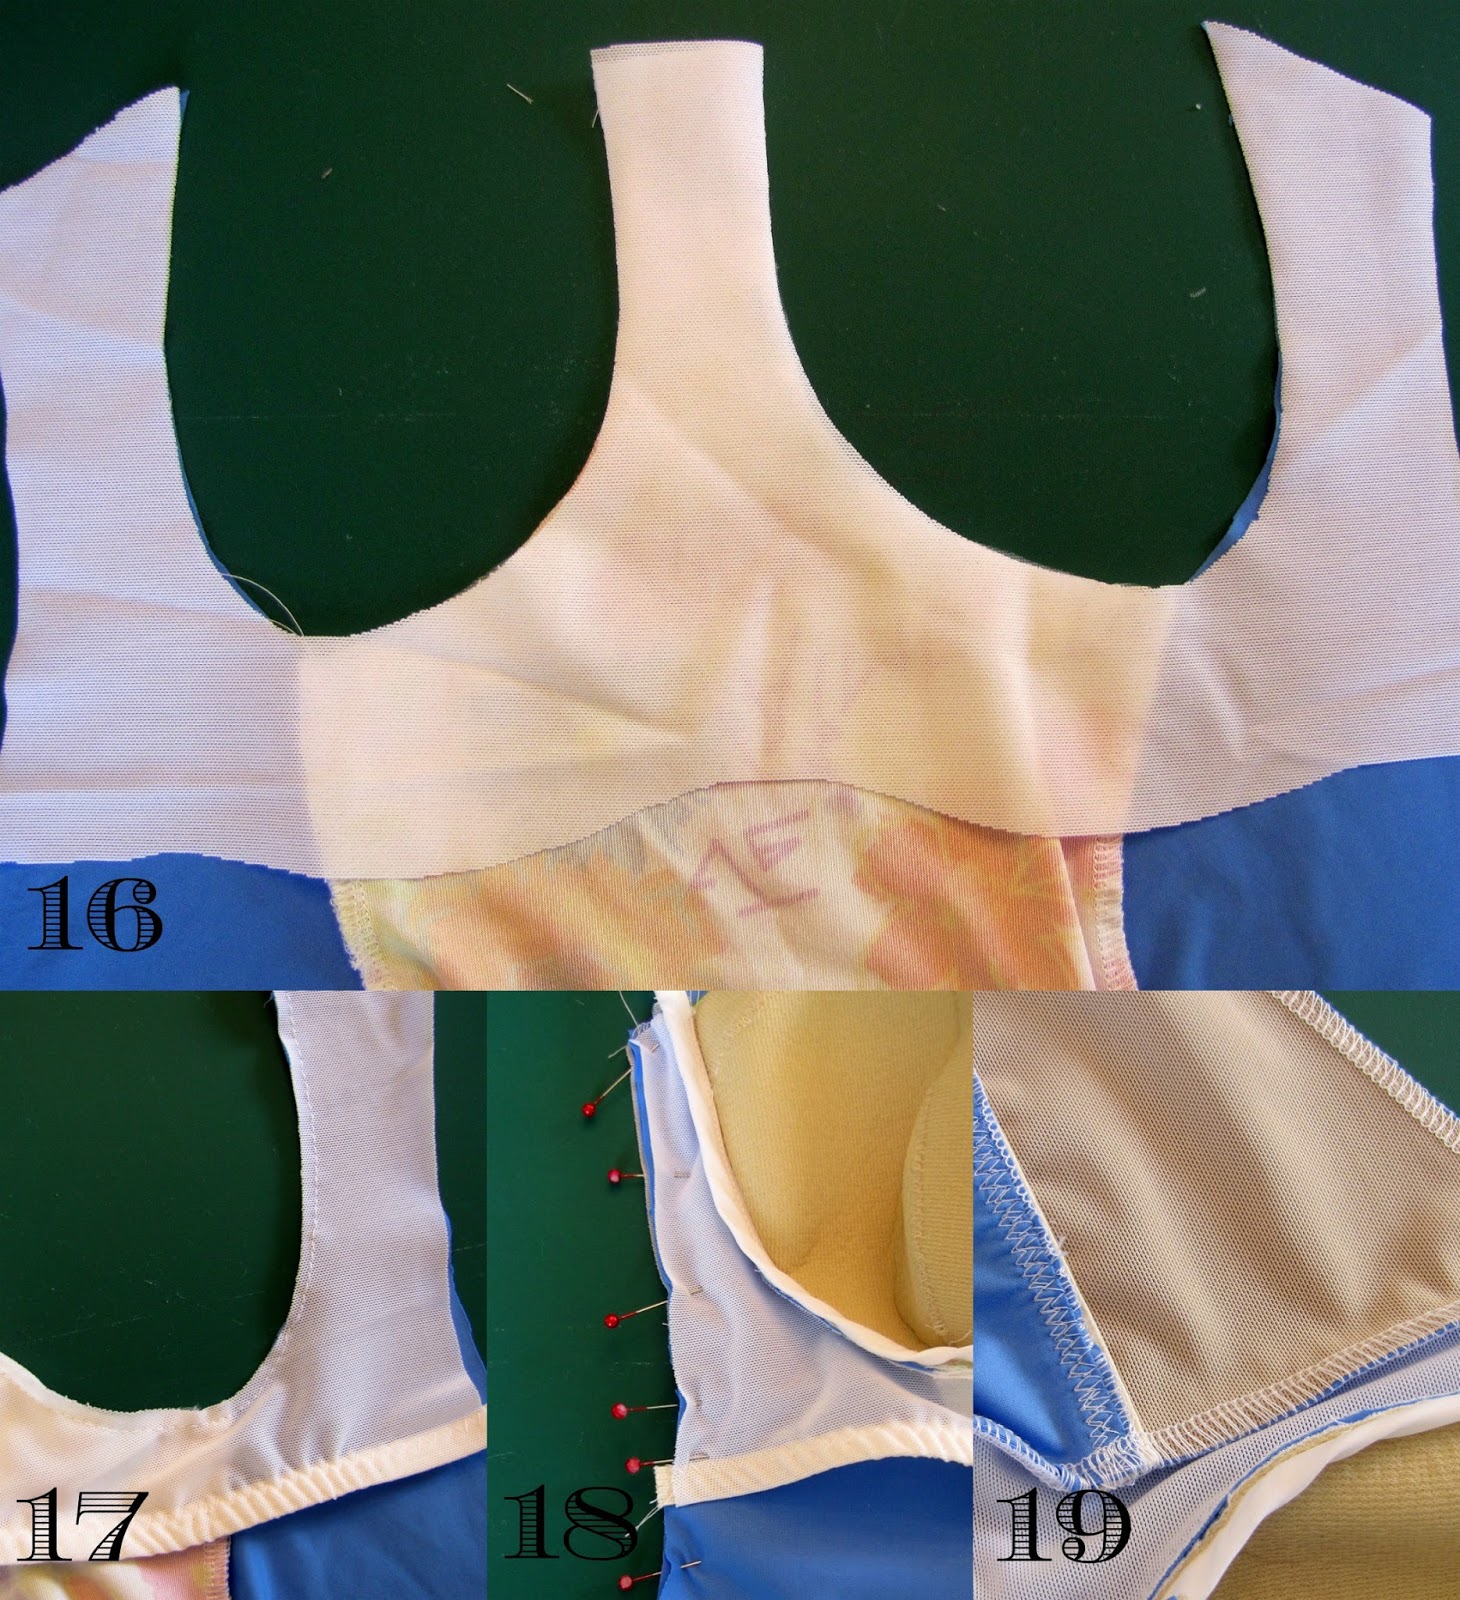
12. Now it’s time to attach the wings to your suit. Line up the bottom edge of your wings with the top edge of your swimsuit back, right sides together. Zig zag, or serge, with a 3/8″ seam allowance.
13. With the wrong side of the wing facing up, pin 3/8″ elastic to the edge. Heather suggests 90% for the bottom of the bikini band and I’ve used that same ratio for my wing backs.
14. Attach elastic with a zig zag stitch.
15. Fold the seam allowance up and stitch through all layers with a zig zag stitch. This is the one area that I prefer to use my walking foot. Layers and slippery fabric! But hey…Looky Dat! You’ve got wings!
At this point you can continue sewing your Sophie Swimsuit as instructed in the pattern. If you need some extra support…well…keep on following along…
16. My swimsuits have a simple shelf bra. I’ve been using power mesh, but I think swimsuit lining would be fine here. After sewing my center front and side front panels together, I trace off the cradle and I add a slight curve on the bottom edge of the shelf bra. On this example, I’ve added a little too much depth…I added 2″…I think that 1-1/2″ would be enough.
17. After sewing on your cradle stabilizer, baste your shelf bra to your swimsuit around the cups with an 1/8″ seam allowance. Then add elastic to the bottom following the instructions for the bikini band.
18. Continue following The Sophie Swimsuit instructions, sewing the side seams together.
19. Here’s a close-up of the side seams. I prefer that the wing seam does not align exactly with the shelf bra. It creates a lot of bulk. Although it’s routine that the side seam allowances are pressed to the back, they naturally lie towards the front seam. Even with offsetting the wing and shelf bra, I find that I like to reinforce the side seam in that area with an extra row of stitching.
Above…here is a visual of a fully lined suit. I sewed the lining to the bottom of the shelf bra just before applying the elastic. For the back, I treated lining and main fabric as one fabric….laying wrong sides together prior to sewing in the keyhole elastic. I then treated the lining and main fabric as one fabric. This method means that the side seams are visible and not enclosed as in the one piece, but I couldn’t think of any other way to do it.
Whew….I think that’s everything! If you have any questions, please ask. If it isn’t making sense to you, there’s a good chance somebody else is having the same head scratching moment….
I’ll be back with Part II – The Tankini soon!






2 Comments
Thank you so much for this tutorial it was very helpful to me! I had the same issues as you with the one piece swimsuit not being supportive enough but preferring to still wear a one pice. This mashup is a great solution, thank you!!
Hey Amy! I’m so happy that the tutorial was helpful for you!
Thanks too, for commenting. It looks like the comments for this post did not transfer over when I moved my blog from Blogspot to WordPress. I’ll have to see if my tech can resurrect them. !