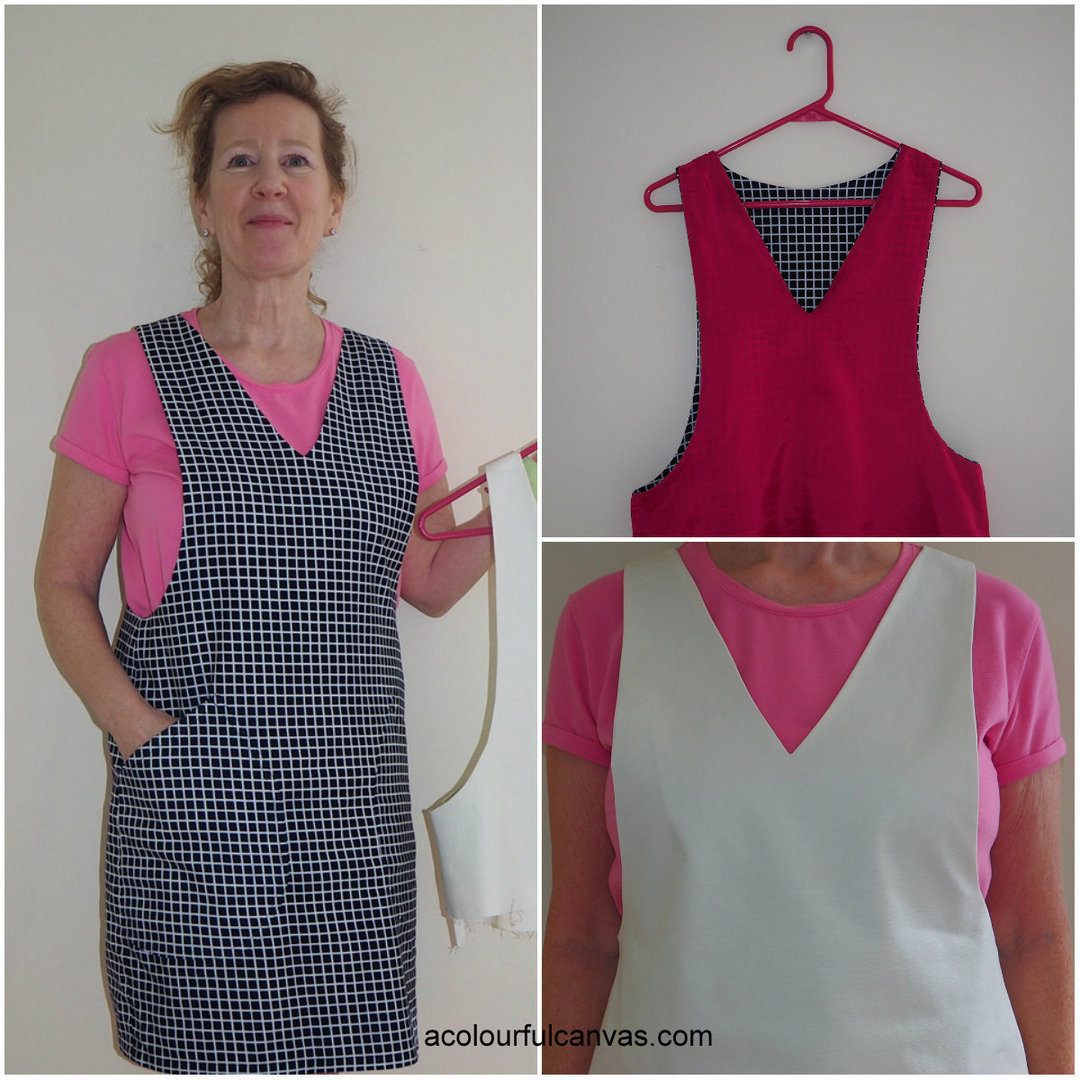
York Pinafore 2.0 : : Helen’s Closet : : Part II: V Neck And Full Lining Hack
Well, hello again!
As promised, I’m back with Part II of my York Pinafore 2.0 saga.
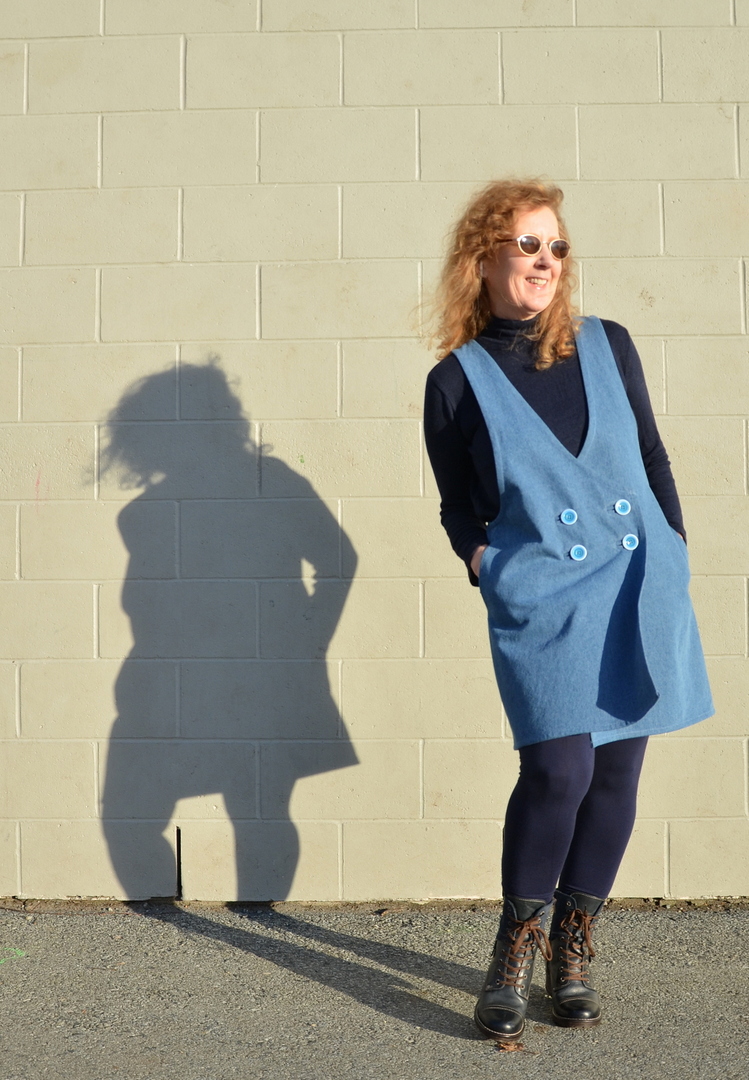
Today I’m demonstrating how I changed the neckline from a scoop to a V and also how I added a full lining.
But quickly, before we get started:
The York Pinafore is rated for beginners but I would classify the lining method I’m demonstrating as an intermediate skill level. That being said, I’ve provided photos for every step and I’ve tried very hard to be clear and concise with my accompanying dialogue. Hey, you may want to give it a go regardless of your skill level. (Your feedback in the comments section will help me to improve the instructions and may also help others that are considering lining their York Pinafores.)
A caution….If your main fabric is heavy/bulky, the lining technique shown here will not be feasible. In both my pinafore and my demo here, I’ve used a lighter weight fabric. If you love this method of adding a lining and you want to use heavyweight main fabric, you might have to tweak the pattern at/near the shoulder. There’s always a way….
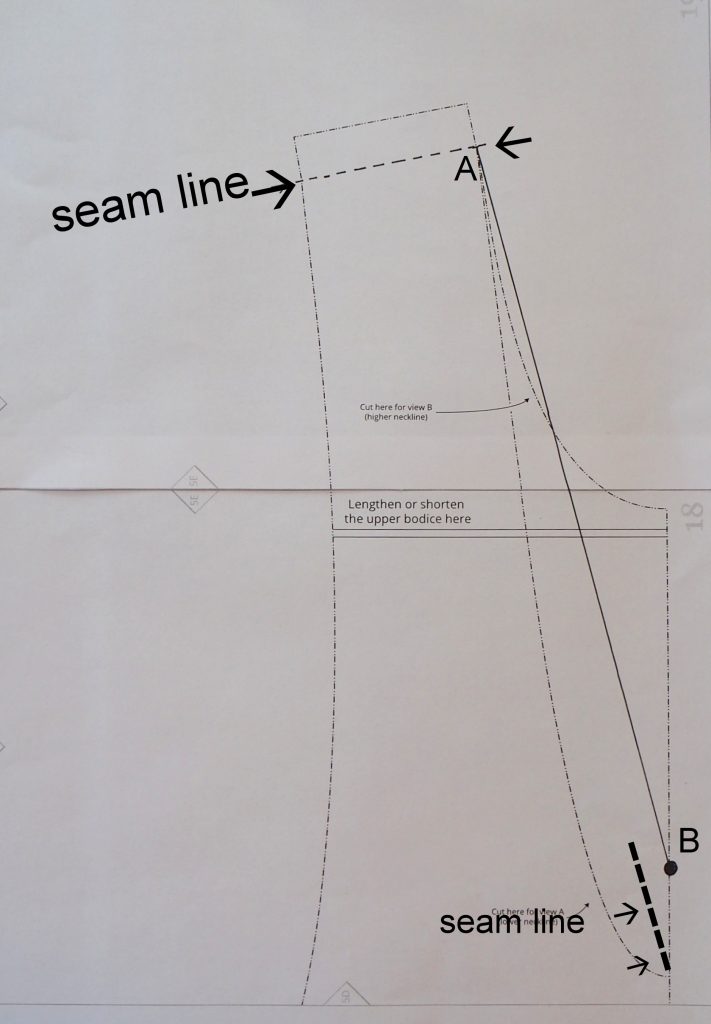
First up…altering the neckline to a V shape. Mark seam line on shoulder. Mark a dot on your center front slightly higher than the desired depth of the V. Your finished V neck will be lower than the mark you’ve made (note: dotted seam line on image above). Draw a straight line from shoulder seam A to mark B.
Next up are the instructions for sewing a full lining which includes finishing the V neckline. Why a full lining? Well….although I imagine it’s possible to make a V neck garment and finish it with bias tape facing, I’m not really sure how to do it and maintain a nice sharp V. I also know it’s possible to draft a neckline facing by tracing off the front and back pattern pieces….but…there isn’t a lot of room in the width of the York Pinafore at the shoulder to accommodate a facing. A full lining just makes the most sense to me.
You will need the pinafore front and pinafore back pattern pieces cut out of lining fabric.

- To begin, follow pattern instructions…add pockets (or pouch), stay stitch and sew main garment front and back pieces together at shoulder seams. Press seams open. Lay main fabric {white}, right side facing up, on work surface.
- Sew lining pieces, front and back together at shoulders. Lay lining fabric {green}, wrong side facing up, on top of main fabric. Pin lining to main fabric along neckline.
- Mark the center of your garment with a disappearing fabric pen or appropriately placed pin. This helps to achieve a perfectly centered V. Please disregard that my V is slightly curved. Yours will likely be a sharp point!

4. Sew around the neckline at desired seam allowance, pivoting at the marked center line. I advise that you sew the neckline with the main fabric facing up. I also suggest reinforcing the stitching at/near the V, with smaller stitches and/or a second row of stitches on top of your original stitching.
5. Grade seam allowances, clip curves.
6. Clip to, but not through, your fabric at the V.
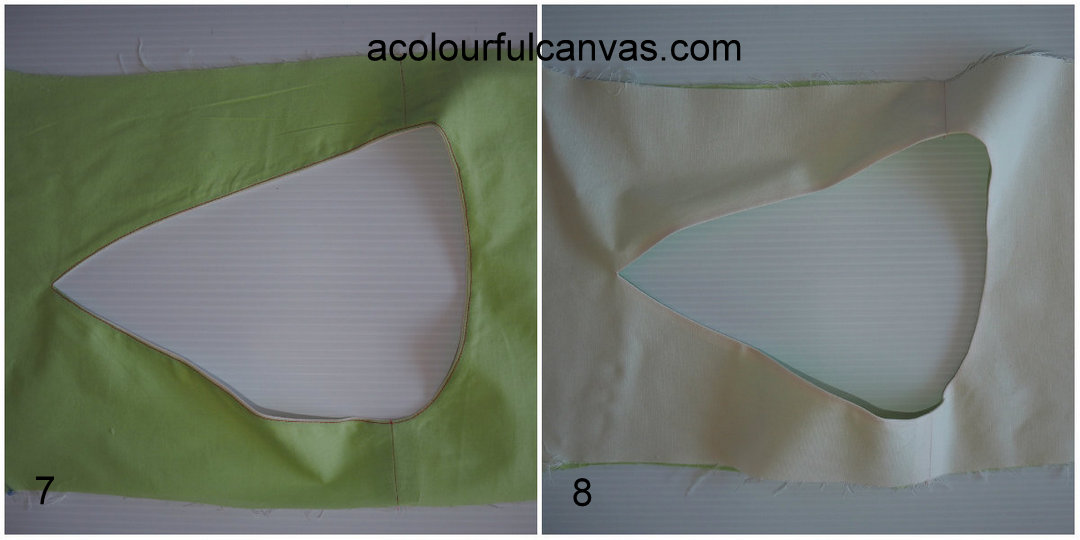
7. Flip lining through the neck opening. Press and under stitch the lining. Under stitching is a sewing technique that helps facings and linings lay flat. I will assume you are familiar with this technique but briefly….with the right side of lining face up, stitch through lining and seam allowance of neckline at a distance of 1/8″ away from seam line. Ensure that your main fabric is clear of the needle….do not stitch through your main fabric!
8. Give your neckline a good pressing.
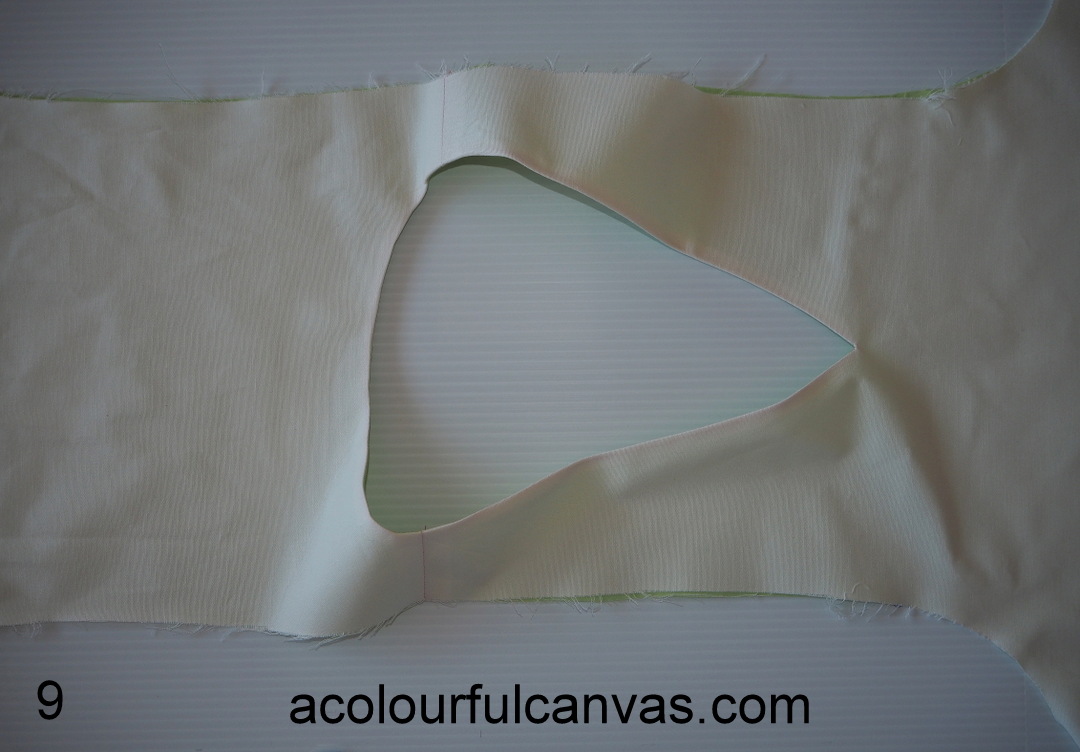
9. In steps 10 – 14, we will be sewing the main fabric and lining together at the armholes. To begin, lay your pinafore flat on your work surface with right side of main fabric facing up. Note the V of the neckline is facing to the right.
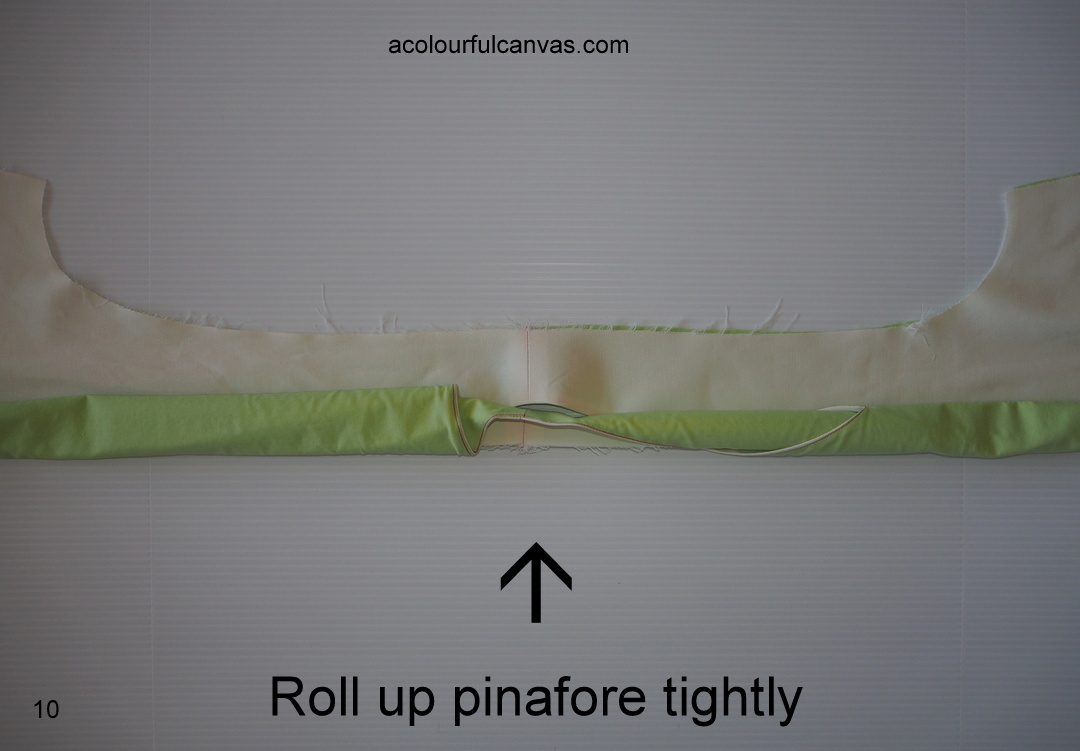
10. Beginning at the armhole edge closest to you, roll the pinafore up tightly. Stop when you get close to the top armhole.
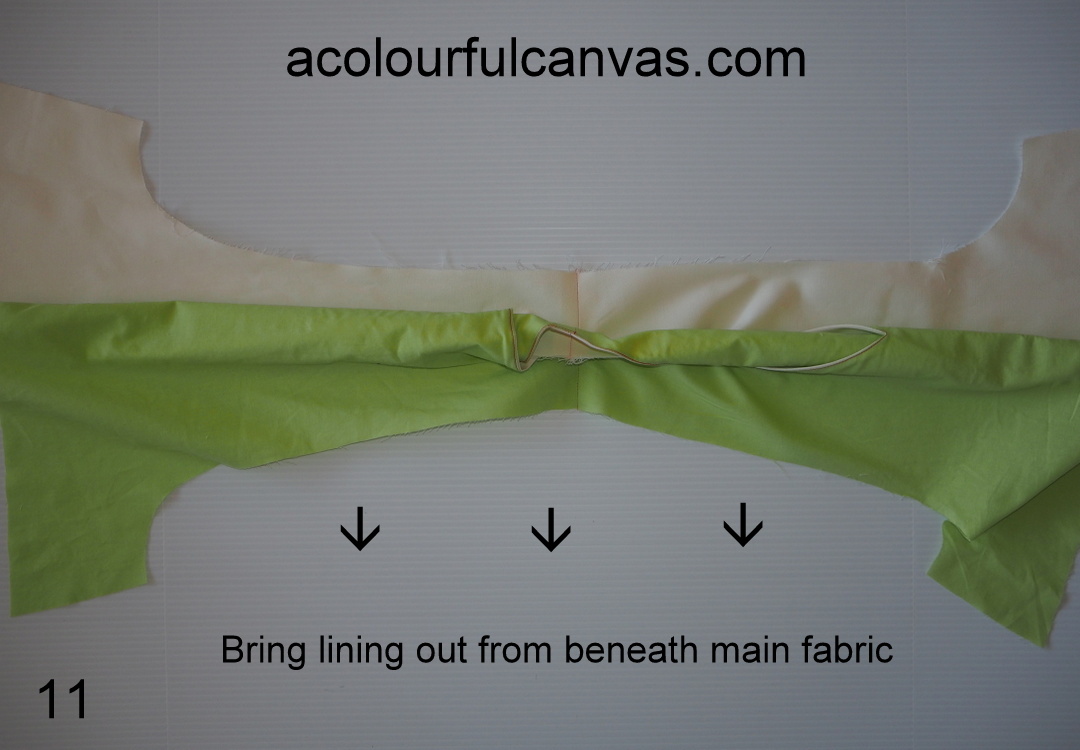
11. While gently holding your main fabric in place, ease the lining out from underneath it, pulling it down towards you. Both the right side of the main fabric and the right side of the lining fabric are now face up.
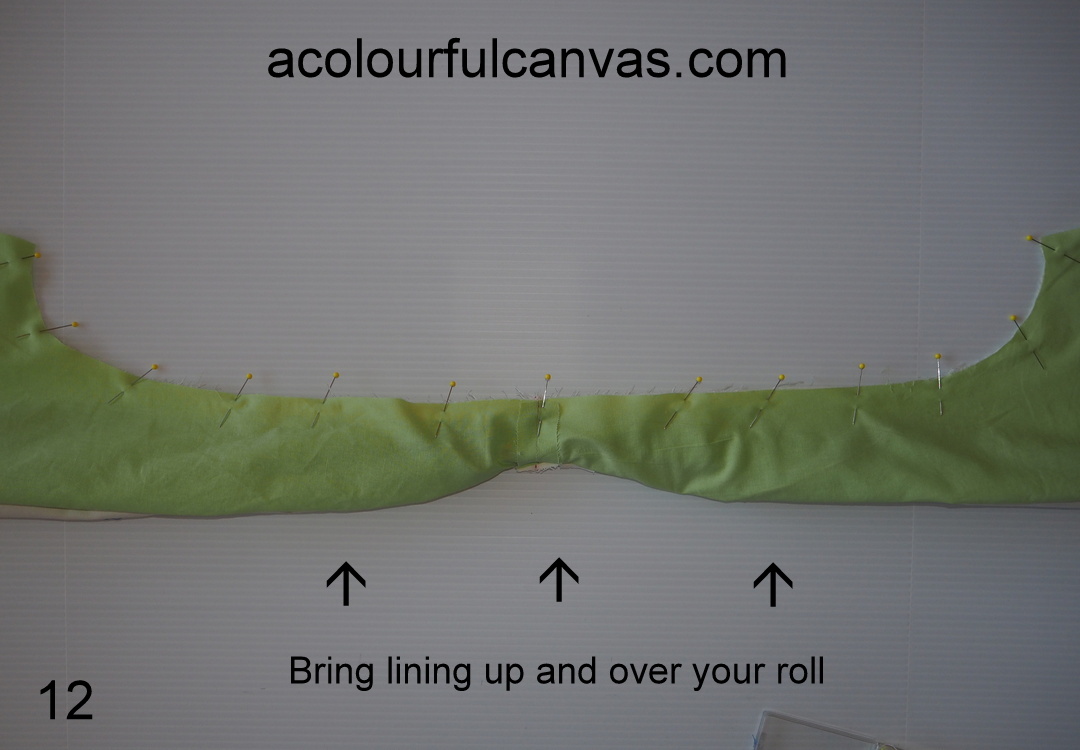
12. Flip the lining up and over your rolled garment and align it with the main fabric armhole edge. The wrong side of the lining is face up now. Pin lining to main fabric, right sides together. Be careful not to catch any of your roll in your pins.
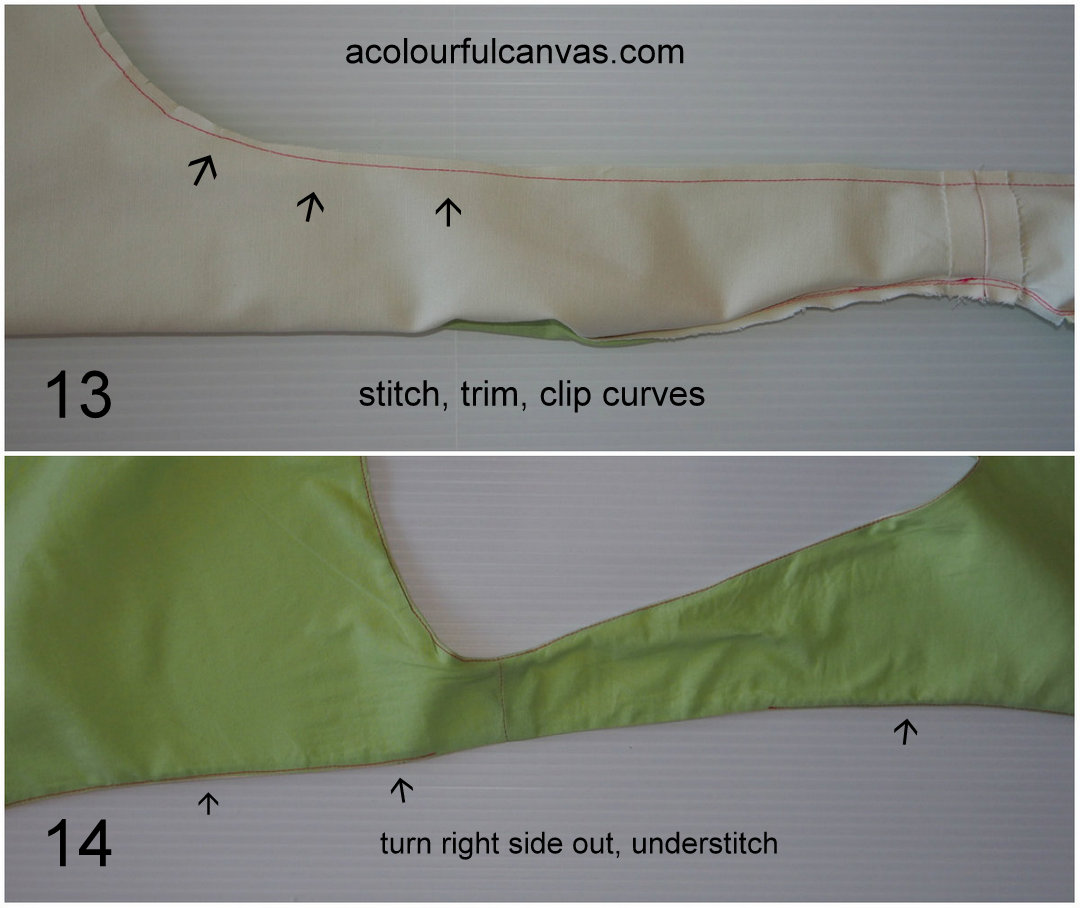
13. Stitch armhole seam carefully, again being mindful not to catch your rolled up garment in your stitching. Trim and grade seam allowance. Clip curves. It will now look like you’ve sewn a tube with your rolled up garment inside it. Reach into the tube and grasp the rolled fabric, then gently pull on the roll, easing the fabric right side out.
14. Under stitch the armhole edge following the same principles as applied to the neckline. You won’t be able to stitch the entire length of the armhole…just go as far as you can. Press fabric.
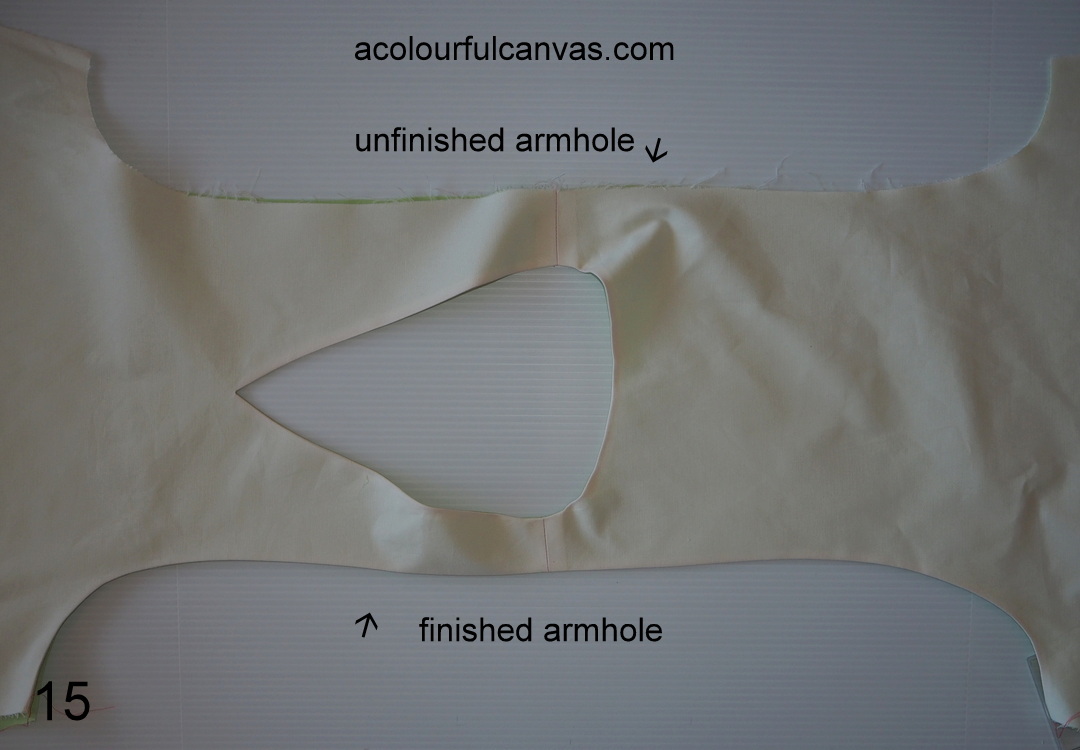
15. To sew the other armhole, lay your garment flat on work surface with main fabric right side up, unfinished edge of armhole at the top. The finished armhole is closest to you, at bottom of photo. Repeat steps 10 through 14.
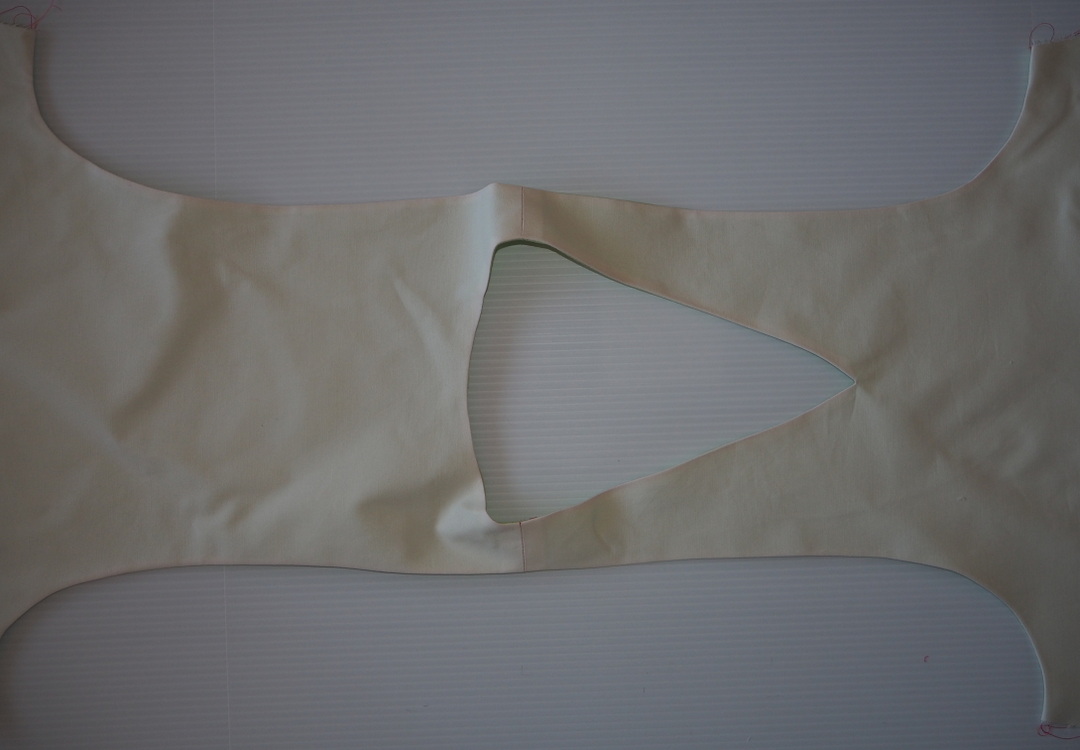
Oh my goodness! Looky dat! We’re almost there. We’ve got a finished neckline and two finished armholes.
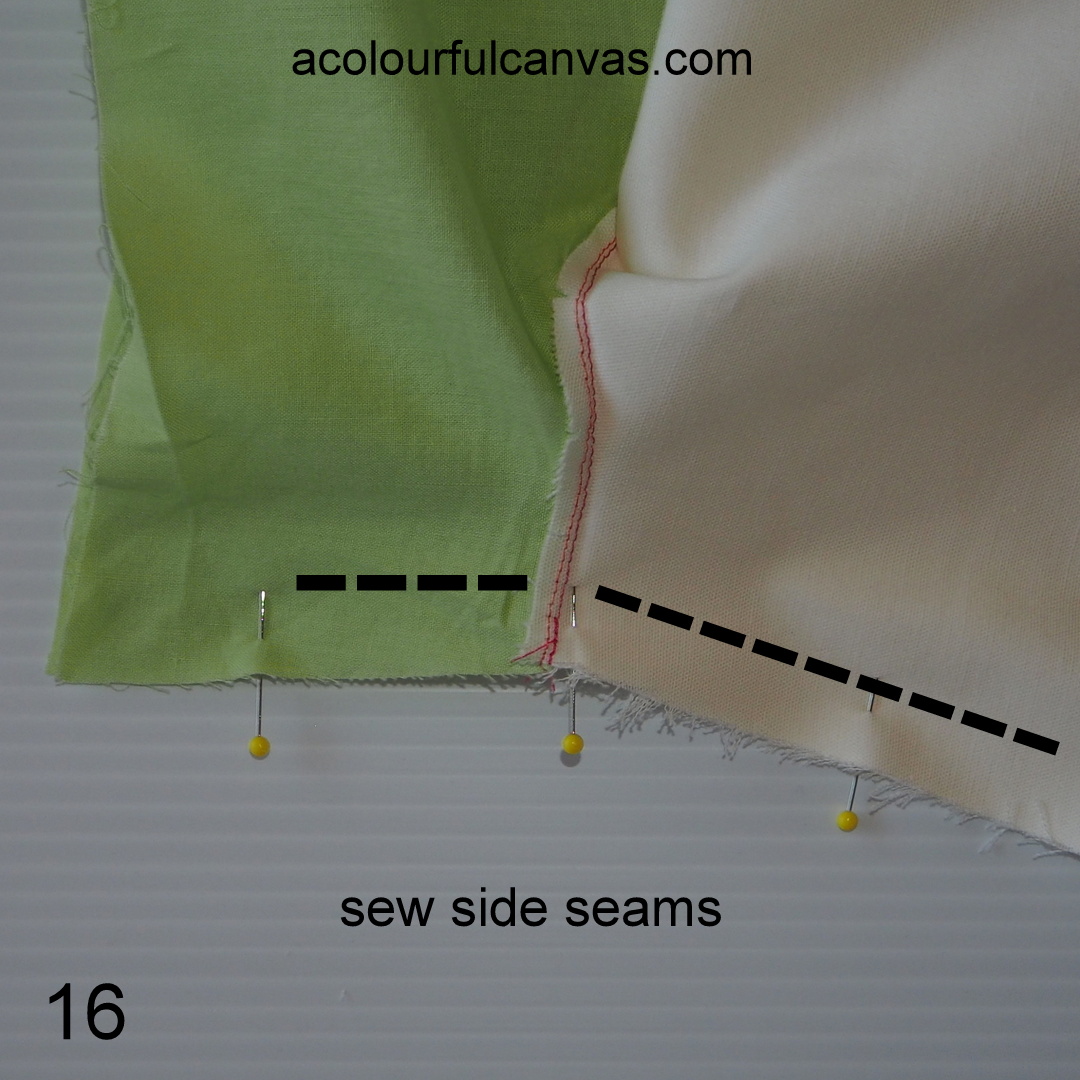
16. The final step is to sew the side seams. Pin garment front to garment back as you would normally, being sure to accurately matching up the seam at the waistline. Continue pinning the front lining to the back lining. Stitch side seam all in one go. Finish seams as desired and give your garment a final pressing.
Okay…that’s everything. I hope you find the instructions easy to follow. Lots of options for our York Pinafores, amirite?
The link to Part I: Unconventional Full Bust Adjustment here
Wearing : :
York Pinafore : : Helen’s Closet, available in her store here
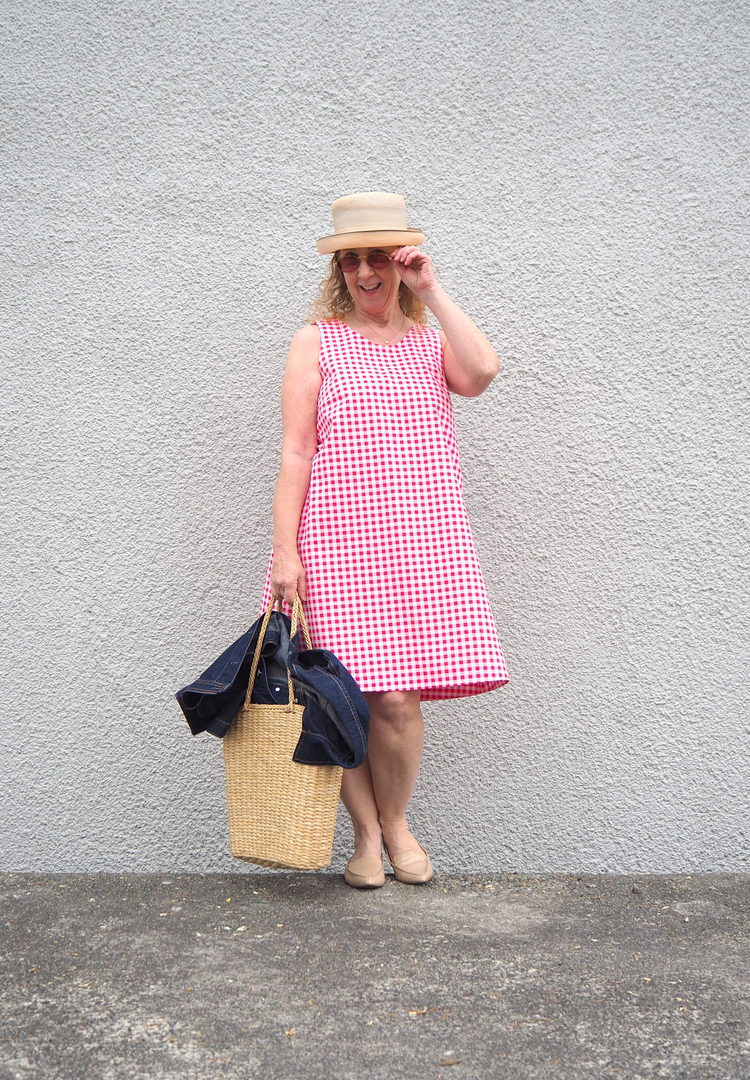
Jeanne T Shirt : : Ready To Sew, available in her store here



17 Comments
Thank you Sue, this is brilliant and perfectly documented.
Suzy (Spain)
Thanks so much for your comment Suzy! I think lining techniques are always helpful…I’ll be referring back to this myself.
This post just reminds me of why I do not sew anymore. Too difficult, taking up too much time with no guaranteed result.
For you this is a hobby. I was always only interested in the result.
I take off my hat to you.
Greetje
This is a very good point that you bring up, and want I might explore in a future blog post. I know precisely what you mean about sewing for the result and, although I’ve always loved the creative side of sewing, I most definitely had a period where I sewed for the result. AND…there were many moments of frustration with the finished result. Ermmm…yes, I may have thrown garments across rooms, LOL.
a lot of work but worth it in the end!!!
Yes, definitely worth it in the end. Perhaps surprisingly, with these changes the garment is now a much easier project to sew. Hah…I’ve already forgotten the effort it took me to get there, LOL.
[…] Colourful Canvas made this gorgeous York Pinafore with a hacked v-neck neckline, and a full lining. She wrote a tutorial as […]
Whenever I stop by your blog I learn something new. Seeing your layout for this dress helps me visualize other projects, such as the jumpsuit I finished a few weeks back. I don’t know if you remember, but I had a hard time visualizing how the pattern wanted me to work with the shoulder seams and the lining. I think if I had seen your post then I would have been able to figure it out rather than coming up with my own hacked-together version. Ha ha!
Thanks for all the visuals here! I’ll come back to reference this post the next time I’m working on something like this.
(Fingers crossed this comment goes through!)
Hugs,
Sherry
Adore the V neck. I lined my last York, which was a heavy denim, which I obviously couldn’t burrito. I found the easiest way was to sew the neck line but I made bias tape which I used at the armholes, treating the outer and lining fabric as one – not as elegant as lining the traditional way but who’s going to see LOL
Oh, what you did totally makes sense to me Kathryn. Thanks for sharing.
Ha! I should have paid more attention to these comments …i tried to do the burrito with a corderoy. Mmm… NO! Here comes the stitch ripper. But i dont mind as I learned something new.
Aw…that’s unfortunate Suzanne. Corduroy is a lovely fabric for the York Pinafore but it does tend to be bulky. I hope you were able to finish your York using the traditional method.
Hi! Great hack. Last year I made a flannel York with a full flannel lining (and pockets on both!) for a warm, reversible winter dress. I love a V-neck so I’ll definitely try your V-neck version!
I have a lining tip for you:
Before sewing, trim away 1/8″ from your lining edges at neck and arm holes. When sewing, though, line the edges up exactly. Now when you turn everything right side out, your lining is just slightly smaller than your main fabric and the edges will roll under beautifully when you press!!
This is really helpful when you reach areas that are impossible to understitch, like the narrow part of the armhole.
On my reversible dress, this gives the effect of a very narrow piping when I wear it lining side out 🙂
Happy sewing!
OH WOW…what a brilliant suggestion! Kara, thank you for sharing! I will definitely do this on my next make…I can see this working well for the Ashton Top too!
Thanks for the insight on lining this pinafore. I just downloaded Helens pattern this morning. I found some linen look fabric I loved at Walmart this morning. It was a bit thin. I bought some preshrunk linen colored lining fabric to line it. Thanks for you site. I have lined before but the reminders gave me confidence.
Hi Linda. I’m sorry I didn’t see your email sooner.
Hope all turned out well with your linen-like York Pinafore. It’s sounds like a lovely make…I’ve made more weightier Yorks and a linen one sounds really great for summer!
PS Just now putting together another York PInafore Hack post. 🙂
Thank you for sharing with us,I too always learn something new from your post. we provide.Print Your Memories Photo T-Shirts by Luminous Printing.T shirt printing