
Insulated Kelly Anorak : : Detachable Hood Details : : Closet Case Patterns
Hiya every buddy. You may be missing half of my story. If you are visiting via an email notification or from Bloglovin’, you may have missed my Insulated Kelly Anorak : : Sew Your Wardrobe Basics : : Closet Case Patterns post. I published two posts on March 18 and a single notification…linking here to my hood tutorial…was delivered to some subscribers. Oops…my bad. Please click here to see all the details on my Insulated Kelly Anorak.
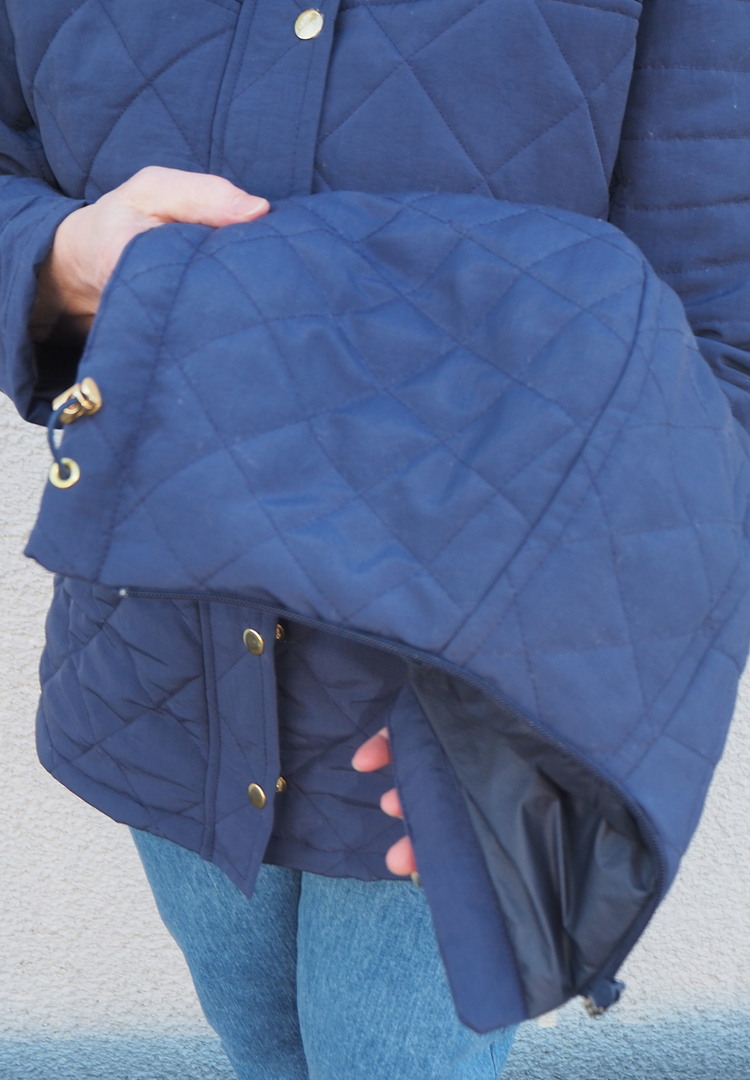
Detachable Zippered Hood

I really like the detachable hood option found on many ready-to-wear jackets. I’ve seen versions with snaps, buttons, velcro and…my personal favourite….zippers! I’ve outlined below how I made mine.

Beginning with the collar:
- Cut collar facing as per pattern.
- Trace a copy of the collar pattern piece. Draw a vertical line approximately 6 1/2″ from center fold line edge. (My zipper is 12″) This vertical line is not parallel to either the fold line or the outer edge. It’s balanced (Sorry, I can’t describe it differently.) Cut along this line and add seam allowances to both pieces. Label the pattern piece that goes on the fold as main collar piece. Make a notation to cut two of the outer collar pieces. (OCP)
- Cut a length of fabric 2 3/4″ wide x the length of your main collar piece. Interface and press wrong sides together. Label this piece zipper facing. (Sorry, it should have been called a placket, but my photo says zipper facing.)
- Baste half of zipper ( I used the half that does not have the zipper pull) in place approx. 1/4″ above the bottom edge of the main collar piece. The teeth of the zipper are directed away from the collar’s raw edge. Place the zipper facing on top of the zipper making sure the raw edges of your zipper facing align with the bottom edge of the main collar piece. The zipper should be hidden by the zipper facing. Be sure there is enough room at the bottom end of the zipper to allow for connecting it with the other zipper half. Stitch zipper facing to main collar piece keeping inside the 5/8″ seam allowance.
- Sew the two outer collar pieces to the main collar. Confirm that the finished collar is the same size as the collar facing.
- Set aside and make hood.
- I felt that the curved snap portion of the hood was redundant so I eliminated it. After quilting my outer hood pieces, I sewed the outer hood pieces together as per the pattern instructions. I did the same with the lining pieces. Sew hood lining to hood facing. *Note: when sewing the hood lining to the hood facing leave a hole of approximately 4″ and do not understitch the seam.
- Sew outer hood to the lining facing. The bottom edge of the hood is open. At this point add grommets to your hood outer piece for the hood cording. I recommend adding an elasticized cord with cord locks because the hood no longer has a front snap closure.
- Now it’s time to set the hood cord in place. Slip the cording in between the hood and the hood lining, snugging it up against the seam line that joins the hood and lining. Wonder Clip it into place along the edge of the hood; draw it out of upper grommet; thread on a cord lock; draw it back into the bottom grommet. Repeat for other side. Wonder Clip the cord to the bottom seam allowance of outer hood. In turn, you can also hand sew the cording to the outer hood (leaving lining free) with a couple of stitches. Remove Wonder Clips that were holding cording in place and turn the hood inside out.
- At this point, I zipped the zipper together. Doing so helped me to get an accurate position for the zipper placement on the hood. Mark zipper placement. Unzip zipper.
- Using the marks as a guide, pin the loose half of the zipper to the bottom seam allowance of the hood, basting in place. The zipper will be sandwiched between the hood and the hood lining. (The zipper teeth are directed away from the raw edge.) Sew the bottom of the hood together. You will be catching in the ends of your hood cord and your zipper. After sewing the seam, turn the hood right side out via through the hole in the hood lining/facing.
- Top stitch the front edge of the hood, ending just above grommets. Do a second row of stitching along the edge of the hood facing. This row of stitching will both close up the hole and make a channel for the hood cord.
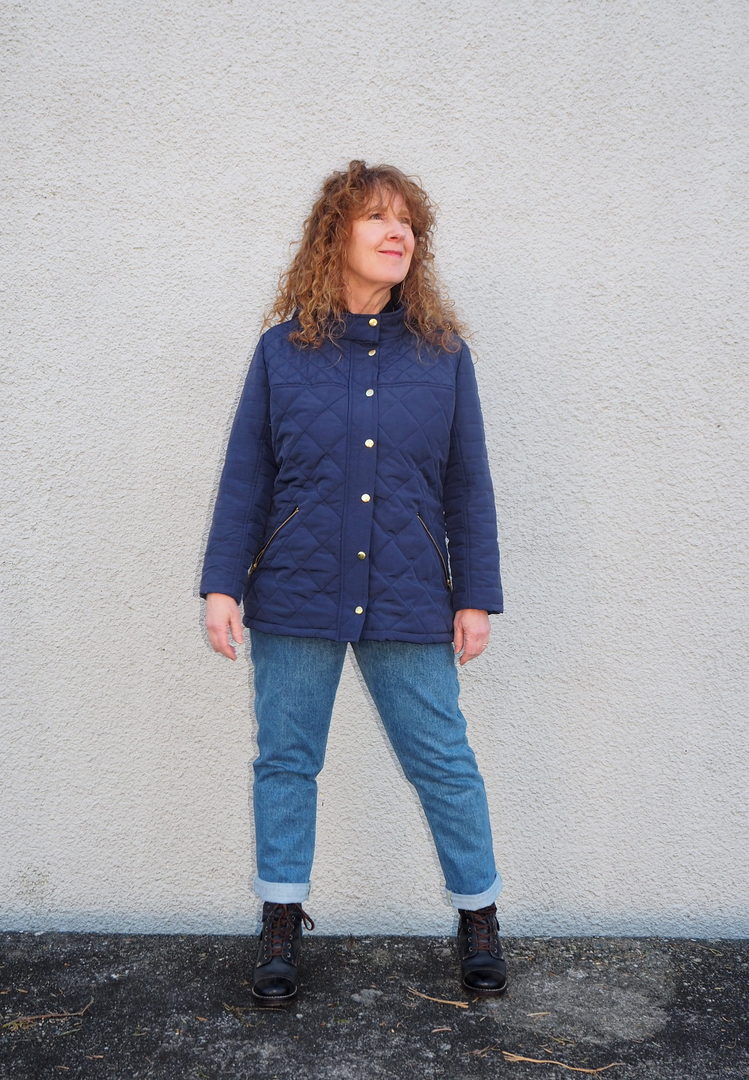
- Zip hood to collar to confirm alignment. Mission detachable hood accomplished.
With the hood complete, I carried on sewing my jacket as instructed.
This post is related to my Insulated Kelly Anorak : : March Sew Your Wardrobe Basics : : Closet Case Patterns post.


3 Comments
Beautiful work! I’ve admired this pattern for a long time but it doesn’t come in my big size. Love yours!
Thank you Barbara. I know that CCP is currently working on updating their pattern line to have a more inclusive size range. Hopefully, in the future, you will be able to make the Kelly Anorak.
[…] refer to this post to see how I made my detachable […]