

My York-Hudson Jumpsuit : : You Can Hack It : : Sew Together For Summer
Why hallo, hallo.

It wasn’t my intention to post three DIY hacks, let alone three York Pinafore DIY hacks, in a row…but…it is what it is. I really like this pattern and it’s very hackable.
I find myself approaching my blog a little differently these days. Like some other sewing bloggers, I’ve been feeling less inclined to blog all my makes. I do, however, still like to look at earlier posts to refresh my memory….checking the fit of a garment, reminders about tweaks I’ve made to patterns…that kind of thing. I find a neatly documented blog post much, much, easier to follow than my scribbled notes on pattern pieces. So for now, I am continuing to document at least some of my makes, albeit with more of an emphasis on details than in previous years. That being said…I do love me a pretty picture and I’m hoping to feel inspired to snap some lovely outdoor photos throughout the summer.
So yes…this is a hack. A fairly detailed hack at that. If it’s not your thing, I get it. I plan to be back soon with a fun outfit post!

: : Pattern Introduction : :
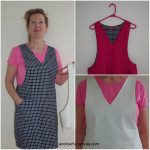
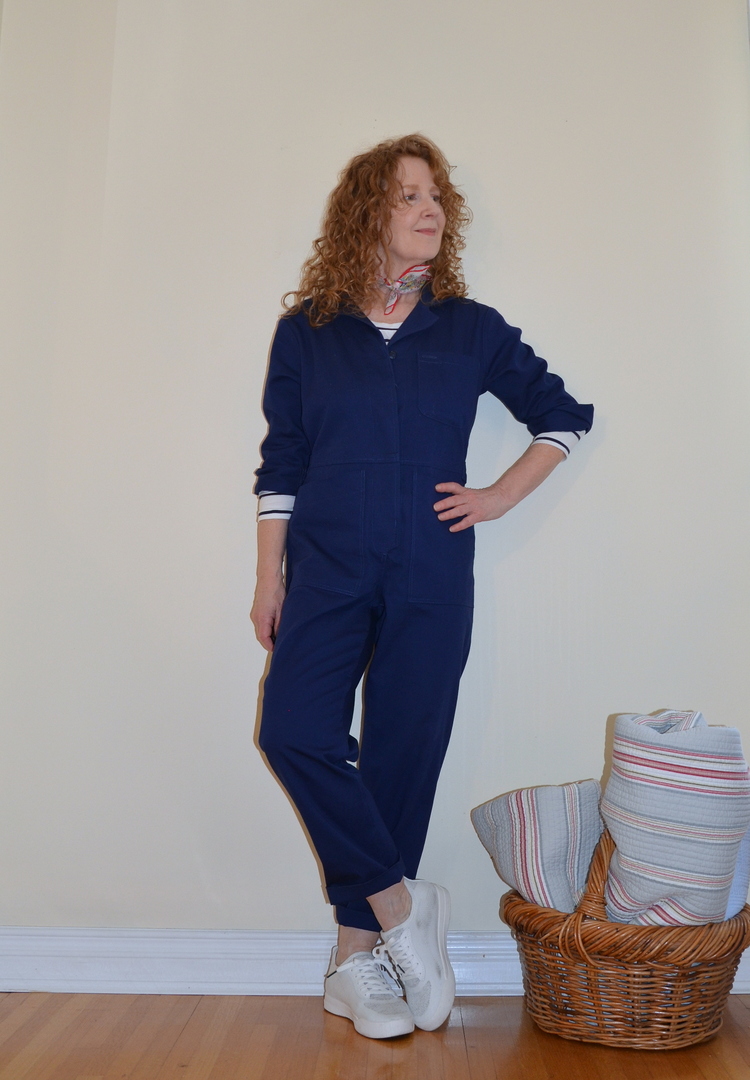
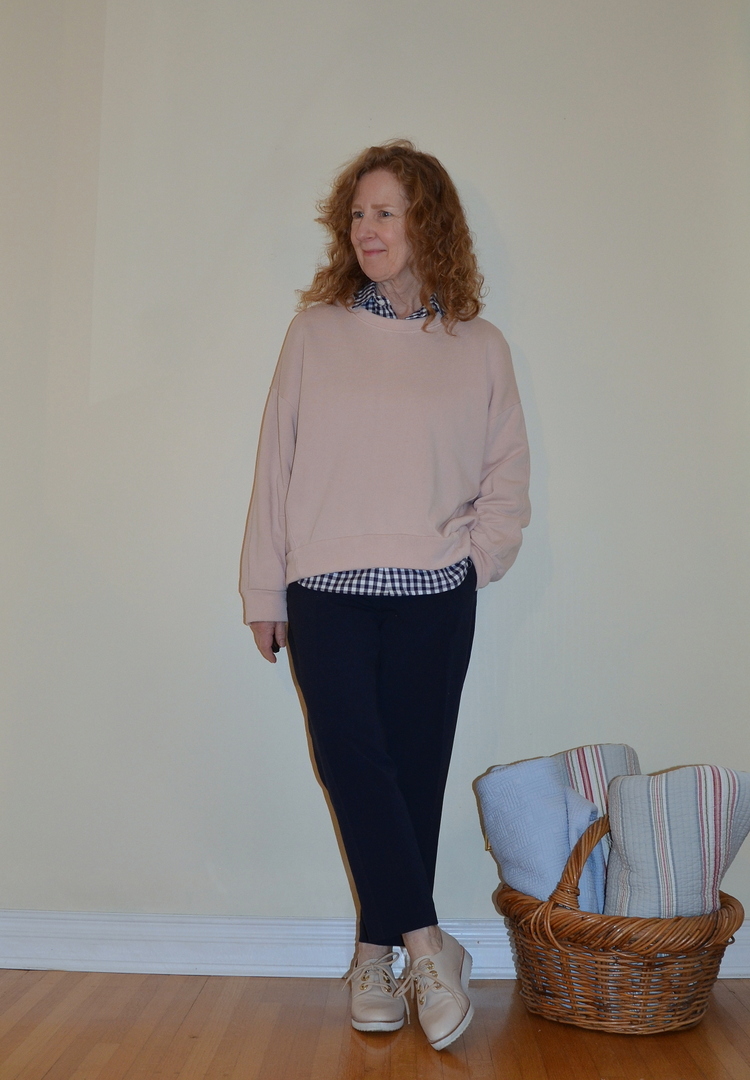
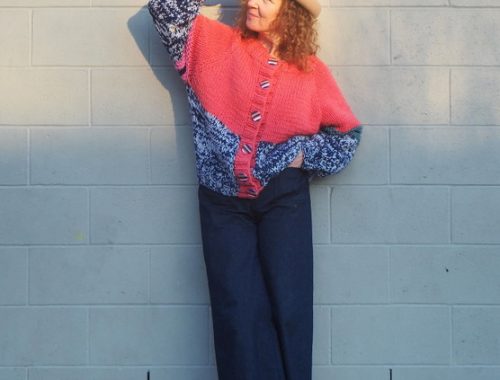
I’m calling this my York-Hudson Jumpsuit…it’s a mash up of two patterns, Helen’s Closet’s York Pinafore with True Bias’ Hudson Pants. The result? Perhaps the comfiest jumpsuit ever. I’ve had this silhouette on my mind for some time…the York Pinafore, but a jumpsuit. It didn’t take much decision making for me to choose the Hudson Pants as the bottom half. York (New York) Hudson (river). See what I did there?
Now before we dive into the tutorial….if you like this look , but aren’t into following my hack….well, I highly recommend you take a looky at Helen’s Closet’s newest pattern…the Yanta Overalls.…possibly the cutest overalls I’ve seen! I’m already imagining a mash-up of the Yanta and my hack.
I’m rating this hack at an intermediate skill level….to be honest it challenged me putting together this tutorial. I started by taking photos of my process while sewing a navy blue linen/rayon York-Hudson. Couldn’t see a darn thing, so I opted to sew a tiny sample. As always, if you have questions or I’ve missed something, please comment or pop me an email.
: : PATTERN PREPARATION : :
I made my jumpsuit with woven fabric so the first step is to print your Hudson Pants pattern two sizes larger than you usually wear. See Kelli’s post for making your Hudson Pants out of a woven here.
MEASURING

I found the most accurate way to measure for the length was to wear both my York Pinafore and my Hudson Pants. At the same time. Fold up your pinafore so your Hudson Pants are visible. Have someone carefully measure you beginning at the neckline of your pinafore and continuing down the full length of your back and crotch ending at the inner leg seam. Yep….best be someone you know. And know well. This is your LENGTH measurement. Add 3/4″ to this measurement to account for the 3/8″ neckline seam allowance and the 3/8″ Hudson Pants inner leg seam allowance.
(I caution you to not make your jumpsuit too short. Jumpsuits tend to have a slightly dropped crotch in order that you have some ease when sitting down.)
: : COMBINING THE YORK PINAFORE PATTERN WITH THE HUDSON PANTS PATTERN : :
JUMPSUIT BACK

NOTE: The York Pinafore center front and center back pieces are normally placed on a fold. This fold line will be changed to a seam. YOU NEED TO ADD A SEAM ALLOWANCE of 3/8″ to your York Pinafore Back pattern piece along the line where it says to place on fold.
Overlay the Hudson Pants Back on top of your York Pinafore Back piece. Align the crotch seam edge of the Hudson Pants 3/8″ past your York Pinafore Back pattern piece. (Again, see note above.)
Place the Hudson Pants Back piece in position so that the blue line in the photo above is equal to your LENGTH measurement. REMEMBER to add 3/4″ to your LENGTH measurement for seam allowances.
When you have the length correct, tape pieces together being sure that the grainline of the Hudson Pants Back matches the grainline of the York Pinafore.
NOTE: You can see that my outer pants pattern piece lines up with the outer edges of my pinafore pieces. This may not be the case for you. If not, I would recommend using the widest pattern piece when drafting the outer leg silhouette.
JUMPSUIT FRONT

The Hudson Pants Front must also be placed 3/8″ beyond the center front line of the York Pinafore Front.

The placement of the Hudson Pants Front on the York Pinafore Front is in direct relation to the back piece you’ve already created. Note in the photo above that the armhole edges of the York Pinafore line up with each other as they should, AND that the Hudson Pants pieces also line up. Also be sure that your grainlines match up on your front pieces. ***THIS METHOD WORKED VERY WELL FOR ME, HOWEVER, YOU MAY WISH TO TAKE A ‘FRONT LENGTH’ MEASUREMENT OF YOURSELF TO BE SURE YOU HAVE ENOUGH LENGTH IN THE FRONT OF THE JUMPSUIT.
Blend your York Pinafore outer sides with your Hudson Pants outer legs to create a smooth outer leg. *I made my Hudson legs a little wider than the pattern specs. I also intentionally followed the silhouette of the York until the height of the crotch line because I wanted an easy, loose, slightly tulip-y shape.
FRONT (CONTINUED): INTEGRATED PLACKET/FACING

Okay! The integrated button placket/facing is an important component of my hack! In order to be able to put the jumpsuit on, you need to have an opening in the neckline.
The front will likely not need to open as low as a pants zipper. My placket/facing begins about 6″ below my natural waistline.
Left Front: Add 2 1/4″ to the center front of your pattern piece. NOTE: The York Front is normally placed on a fold. The edge of the York pattern piece is your center front line!
Right Front: Add 1 1/4″ to the center front of your pattern piece.
Mark a dot at the intersection of the crotch seam allowance of 3/8″ and the bottom of the placket/facing seam allowance of 1/4″.
: : CONSTRUCTION : :
My order of construction is a bit unconventional and doesn’t have to be followed, but it does allow for some tweaking of the fit…
Writing in blue indicates that either the York Pinafore or the Hudson Pants instructions are to be followed or that the instructions are open to improvisation (as in the pockets). These have no accompanying photographs.
Stay stitch armholes and necklines.
Add patch pockets, if desired.
Join jumpsuit back pieces together with a 3/8″ seam allowance. Finish seam allowance. Press.
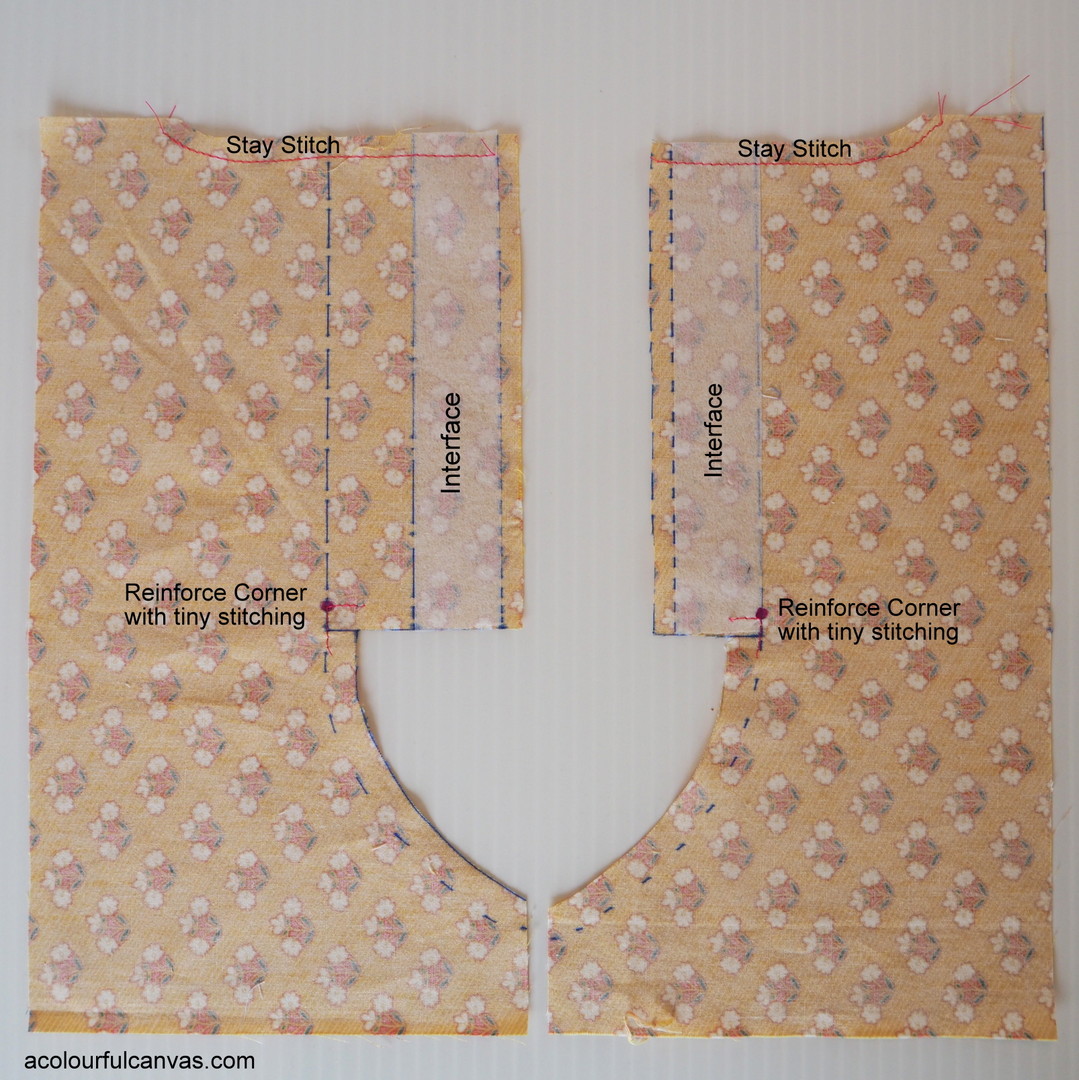
Reinforce corner (dot) of button placket/facing with a short row of small stitches.
Apply lightweight fusible interfacing to placket/facing. Interfacing is cut 1″ wide and the length of your button placket/facing. It is applied 1/4″ in from raw edge on wrong side of fabric.
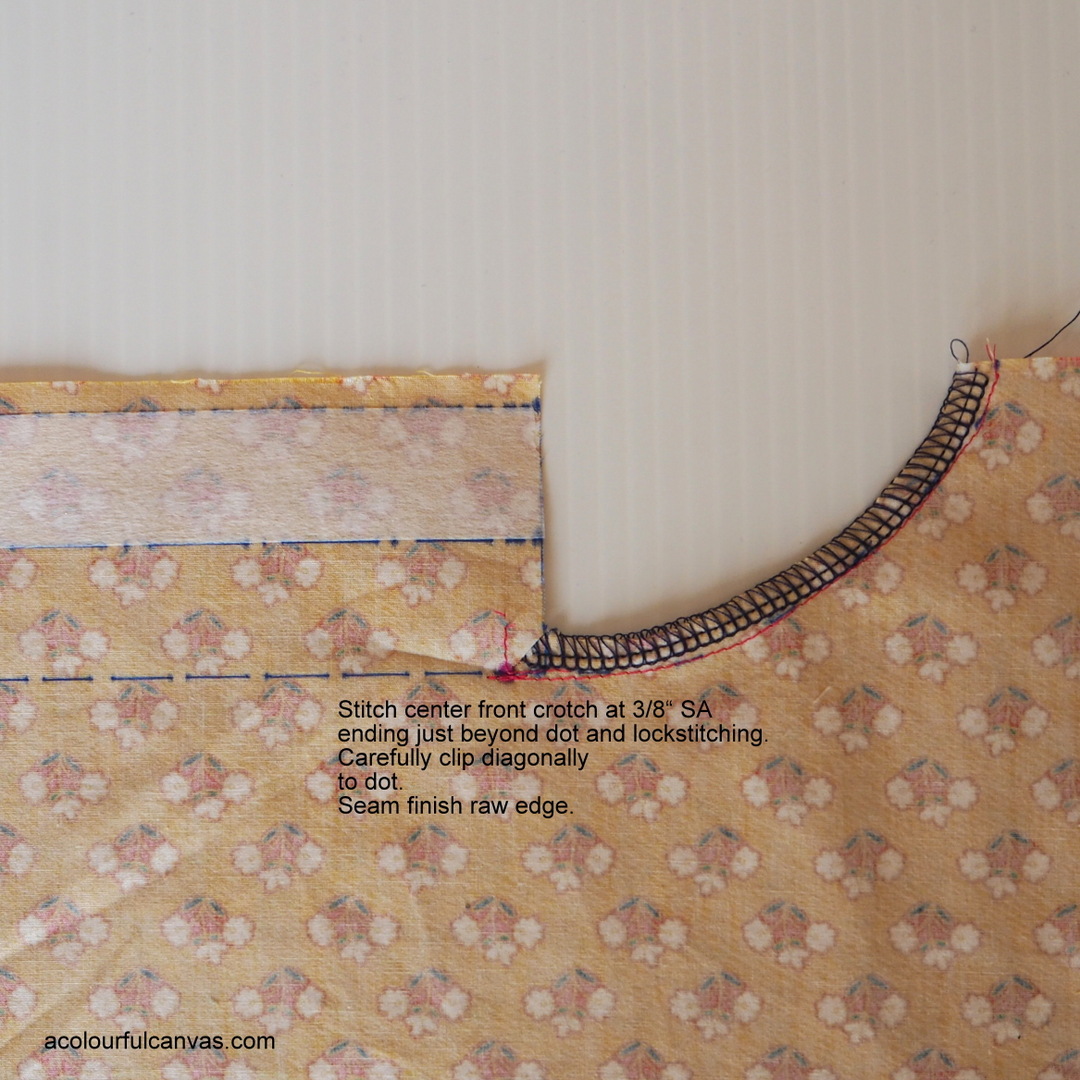
Sew the jumpsuit left and right front pieces right sides together along the crotch seam with a 3/8″ seam allowance. Begin stitching just above your dot and end at the inner leg. Back stitch to secure. Carefully make a small diagonal cut at the inside corner, ending at the marked dot. Cut to, but not through, your stitching lines. Seam finish the raw edge. Press to right front.
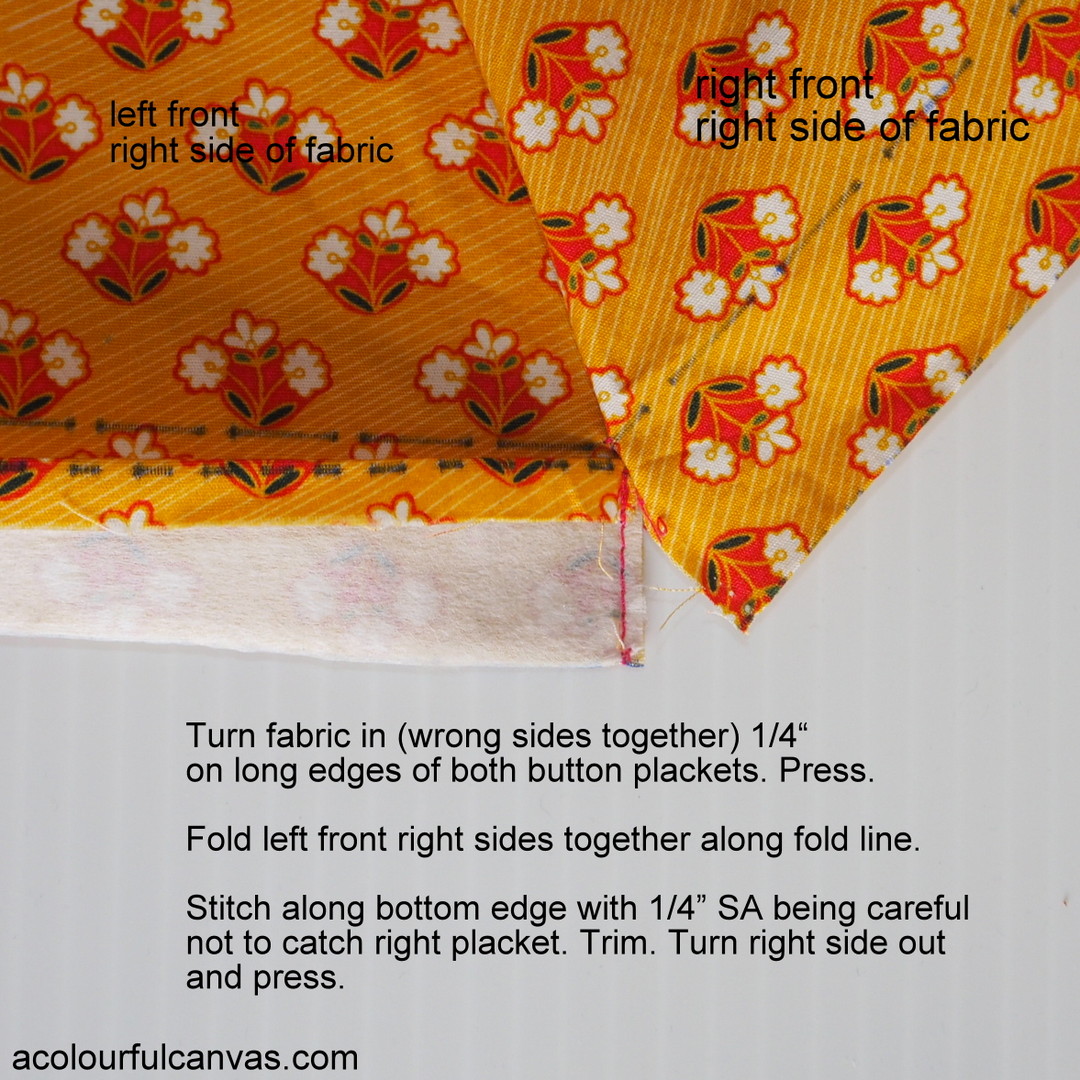
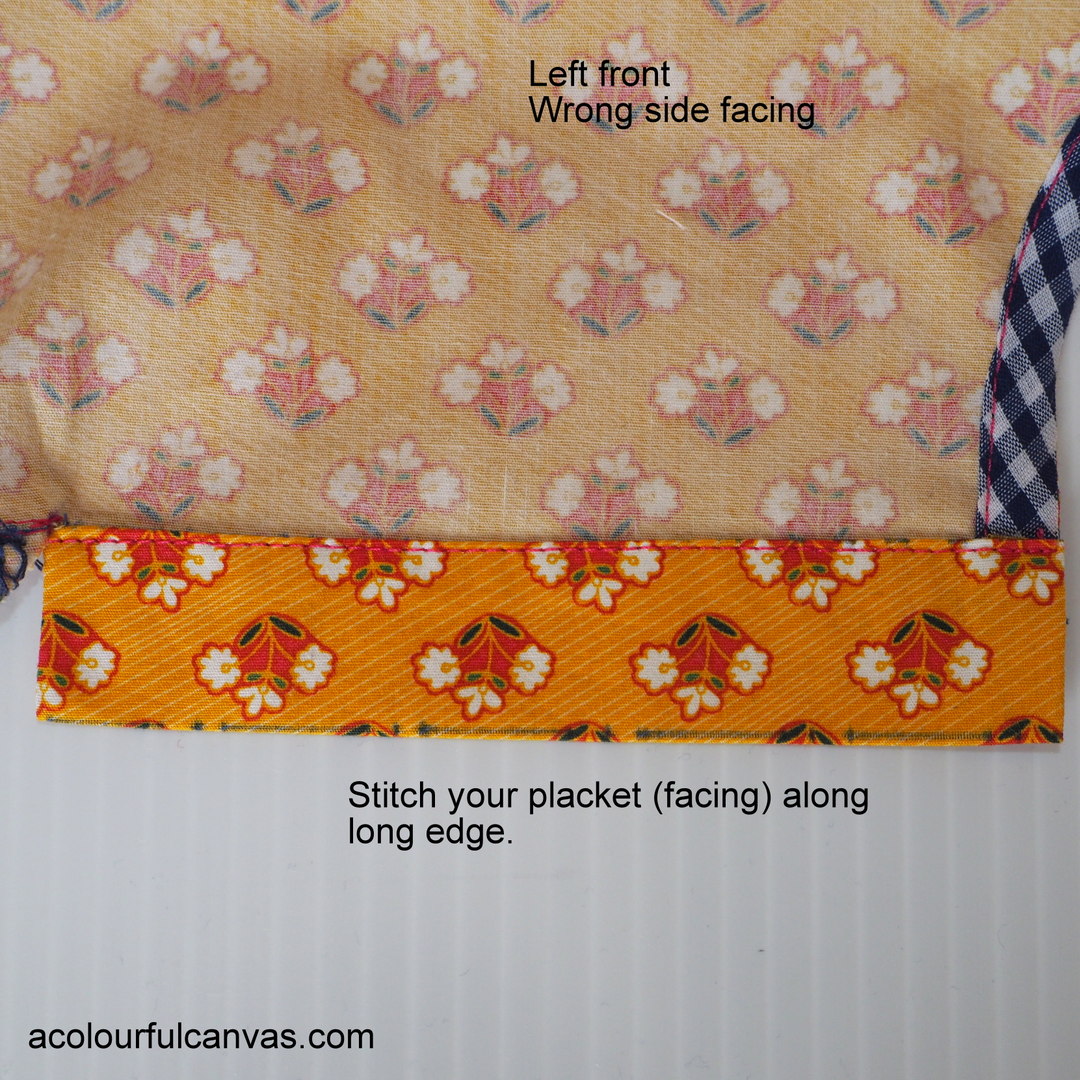
Fold under long raw edges of each button placket/facing by 1/4″. Press.
Fold left front placket right sides together along second fold line. Stitch together with a 1/4″ seam allowance. Be sure to keep the right front out of the way. Trim. Turn left placket right side out and press.
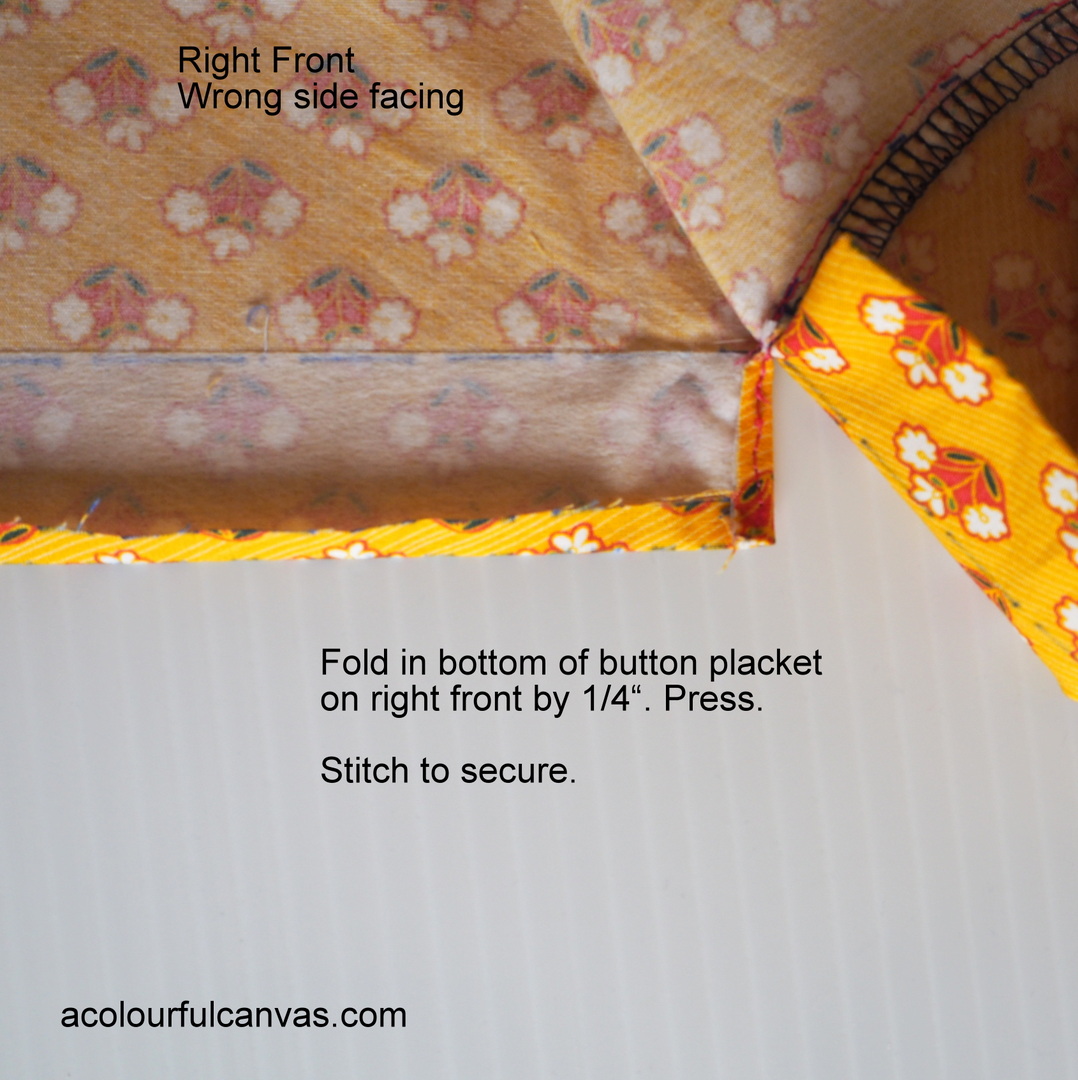
Fold in the bottom of the right front facing by 1/4″. Press and stitch to secure.

Fold right front facing to inside along the center front fold line. Press.
That’s most of the placket/facing done. We’ll return to finish it after the following steps.
Stitch front of jumpsuit to the back of jumpsuit along inner legs, matching crotch seam.
Stitch side seams.
Stitch shoulder seams. At this point you can baste the shoulder seam to check the fit of the jumpsuit. If it is a little long, you can adjust at the shoulder seam.
Finish armholes with bias tape.

Apply bias tape along neckline. Begin and end your bias tape approximately 1/2″ from fold lines of button placket/facings.
CORRECTION: On my garments, but unfortunately not on this sample, when I sewed my final row of bias tape stitching, I had my placket/facing folded into place and I started and ended my stitching at the edge of the garment. Both ways work, but having the placket/facing in place is neater IMO.
With the bias tape completed, you can now stitch the left front placket in place 1/8″ from edge. I sew it with the wrong side of garment facing up; your bobbin thread will be visible on the right side of your garment.
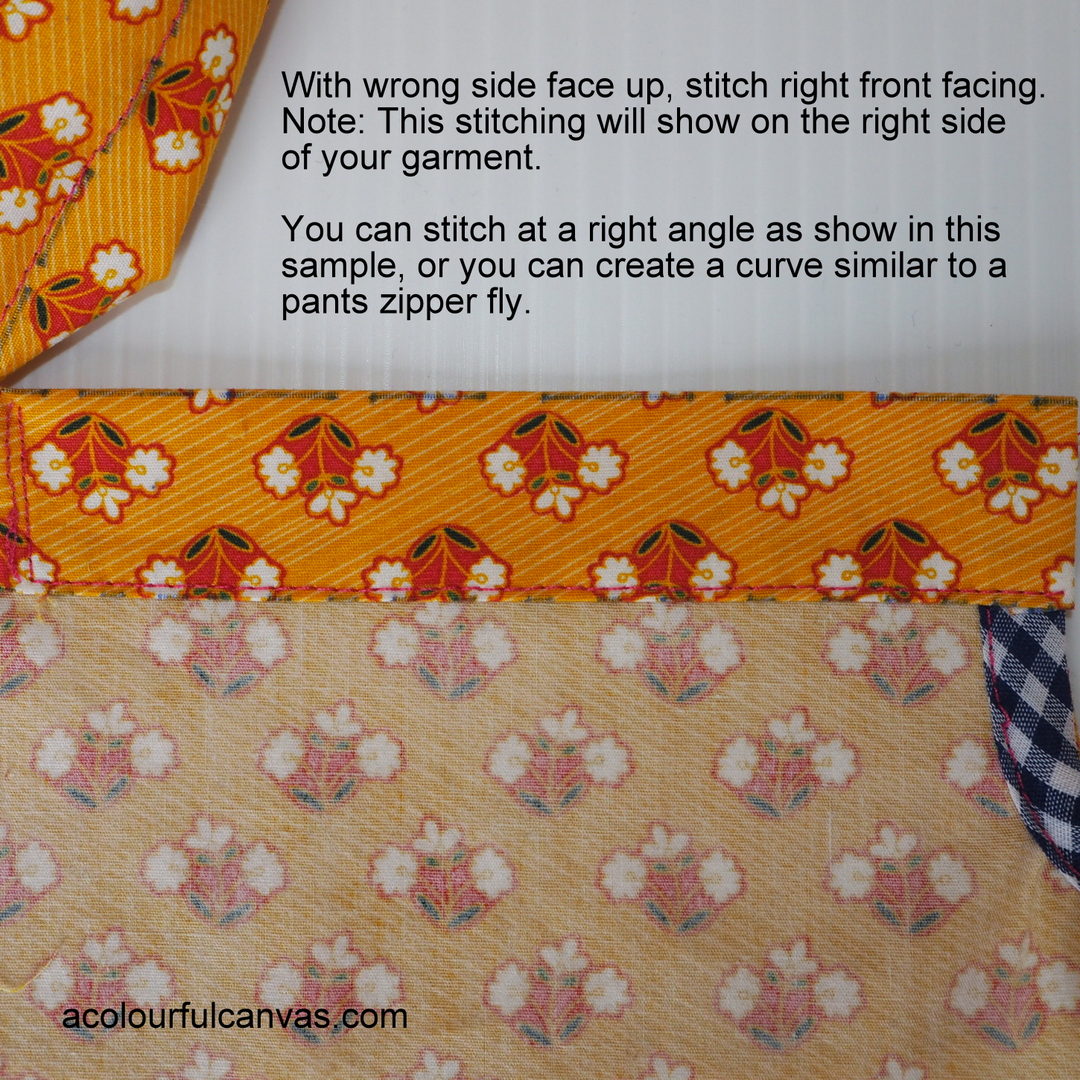
Stitch the right front facing in place. Again, I sew with the wrong side facing up; your bobbin thread will show on the right side of garment. You can sew the bottom of the facing with a right angle as shown, or you can curve the line similar to a pants fly facing.
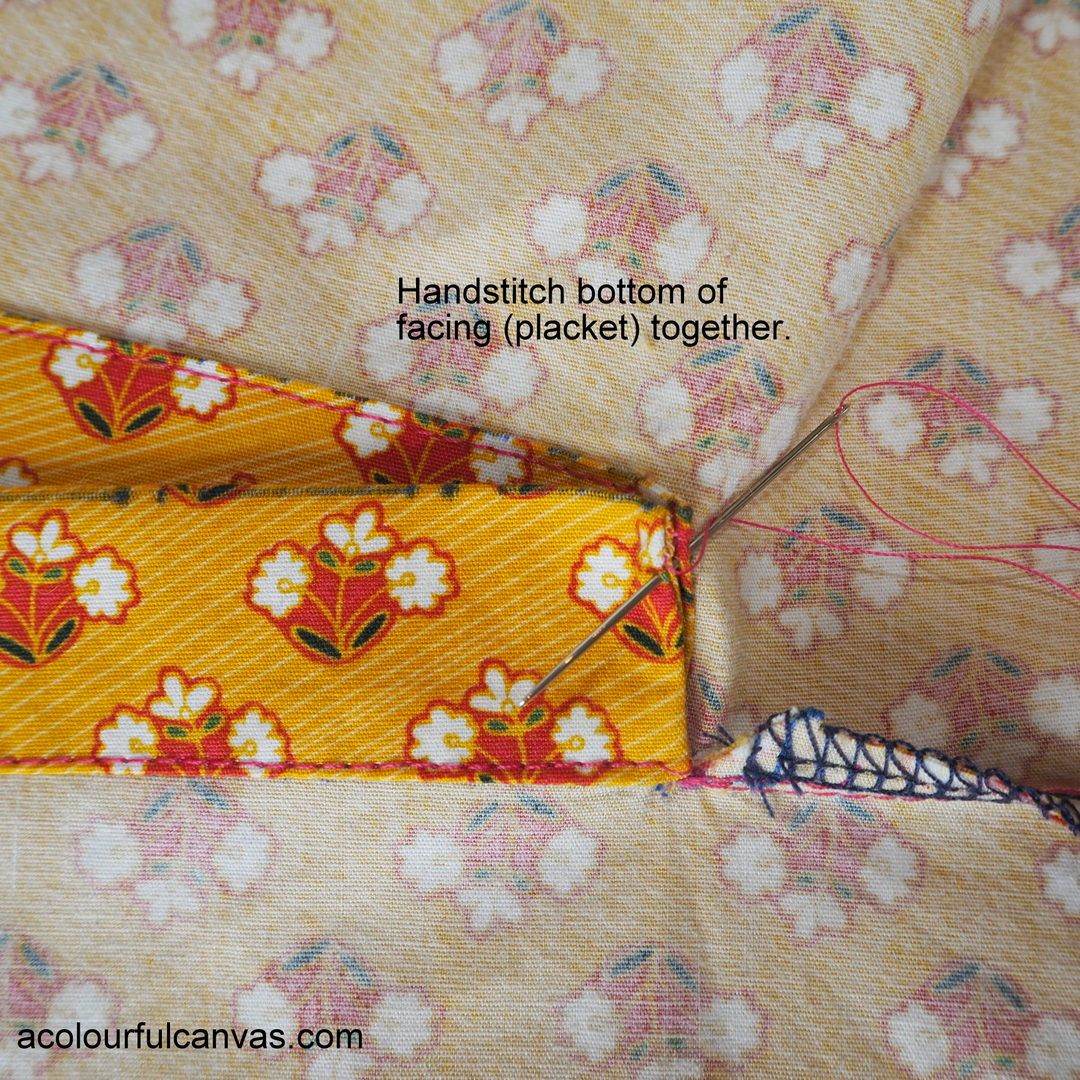
Hand stitch the placket and facing together at the bottom.
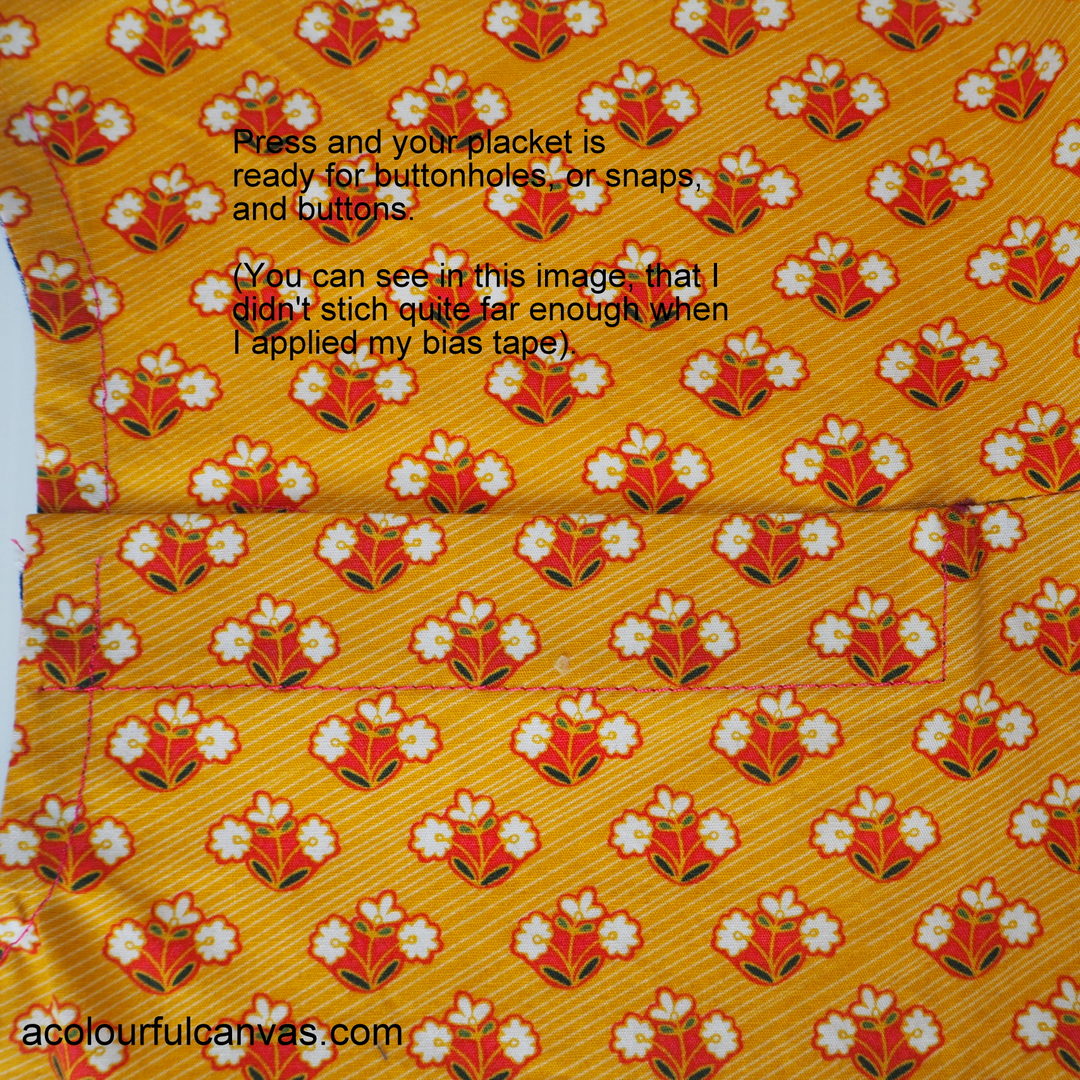
Placket is complete and ready for buttonholes and buttons, or snaps. Note: you can also hand stitch at the tops of your placket/facings to fully enclose the end of the bias tape.
Hem pants.
Jump for joy wearing your York-Hudson Jumpsuit!
Last, but not least, the theme for this year’s #sewtogetherforsummer on Instagram is Jumpsuit. Hands down, STFS is my favourite annual challenge and I’m looking forward to entering a few jumpsuits…including my York-Hudson hacks!

Whew…I’m signing off for now. Thanks so much for reading!


13 Comments
Absolutely my favourite kind of blog post; you’ve done brilliantly with this Sue!! Xxx
Thanks so much Sarah! It feels like the right time for me to document the changes I make. The posts take some time to put together, but it’s comical how confused I can get trying to re-create a hack I’ve done that I didn’t make proper notes on! Heh…the the blog posts are actually time savers…
Sew puny! And your York-Hudson is SO SUE. SO YOU! Thank you for the how-to sewing nitty gritty – exactly what I’m looking for!
Yes. Very, very leetle! Kind of makes me want to sew tiny garments for little people. 🙂
Happy you like the how-I-did-it format of posts!
Look at how fabulous you are – jumping for joy! Love this cute jumpsuit, Sue!
Thanks so much Sheila! I can’t believe how comfortable this make is. I’ve worn it constantly. Thankfully, I have made a second one
I swear the York is such a versatile pattern and so amenable to variations. Great hack and tutorial, Sue! Very cute. Still not convinced I need a jumpsuit but I’ve seen an awful lot of great ones being made.
Thanks Louisa. I agree…the York really does lend itself well to variations and hacking. And no need to get on the jumpsuit train if it’s not your thing. I thing I’ve always loved them.
Just saw the V&A’s Mary Quant show. The neckline of your new jumpsuit is very Mary!
Ooooo…that sounds fabulous Barbara! I’d love to see the show. And what a great compliment…that my neckline is very Mary! I like that, thanks!
Sue, this is the best jumpsuit and these photos of you playing in nature are stellar! Your instructions are amazing and even make me wonder if I might even attempt something like this in the future, not necessarily a hack, but any sewing project of this complexity. Plackets?! Ack! Hahaha. Your results are so good that they inspire.
Thanks Mel. These photos are possibly the most spontaneous of all my photos for the blog. As you know, the photo taking aspect of blogging as had me stymied for some time. We were out enjoying this public garden and I just thought, let’s snap a few pics.
If you do ever embark on a seemingly daunting sewing project and need help…you know you can call on me!
[…] Colourful Canvas hacked the York Pinafore and Hudson Pants together to make an amazing jumpsuit! Is this a dream come […]